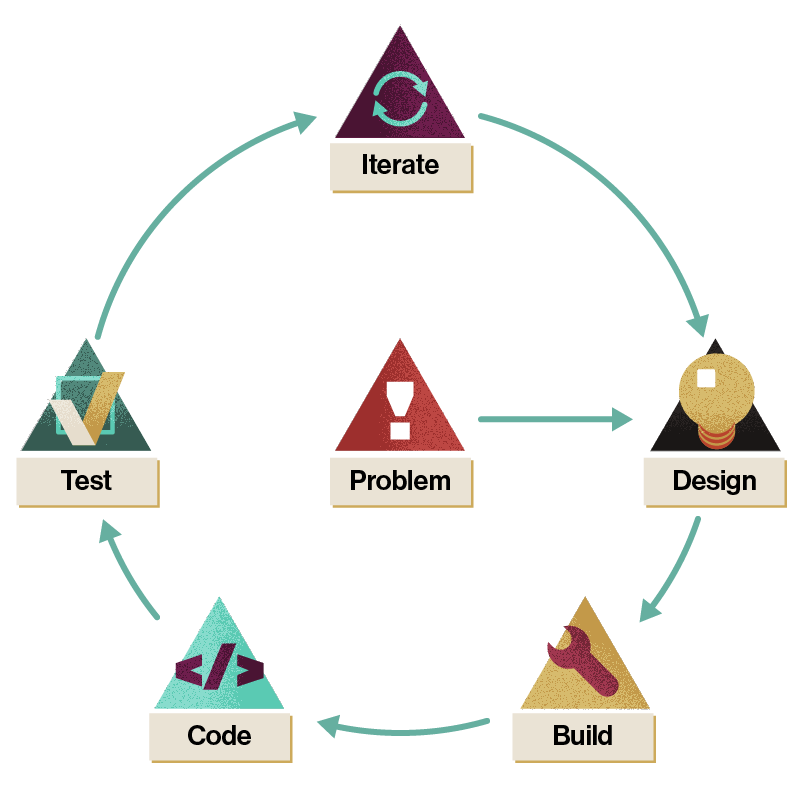
02 Mission Instructions
| Site: | GoLabs |
| Course: | GoBox |
| Book: | 02 Mission Instructions |
| Printed by: | Guest user |
| Date: | Thursday, 18 June 2026, 2:40 PM |
Description
1. Problem

Service animals have been helping people since the Middle Ages (1). Some dogs are trained to help humans walk safely through new places, to open and close doors, deliver messages, retrieve specific items, or even to warn people of an oncoming medical event.
However, training service animals takes a lot of time and expertise, so getting a service animal is too expensive for some people to access. That is where assistive technology can help. Assistive technology helps millions of people with many different tasks. Some assistive devices help people communicate, move independently from place to place, or pick up and use objects. Some examples of assistive technology include: braille and braille typewriters, closed captioning, voice-controlled lights, and cochlear implants (2).
In this mission, you are an engineer tasked with creating a robotic guide dog. Your prototype should be able to lead someone on a pre-planned path around your home without running into walls or obstacles. There are two parts to this challenge:
2. Design: Guide Harness
Before you program your GoPiGo, you need to decide how your robot’s handler will detect the robot stopping. A seeing eye dog wears a harness with a rigid metal handle that allows the handler to feel the dog’s movement. What will you use to harness your GoPiGo?
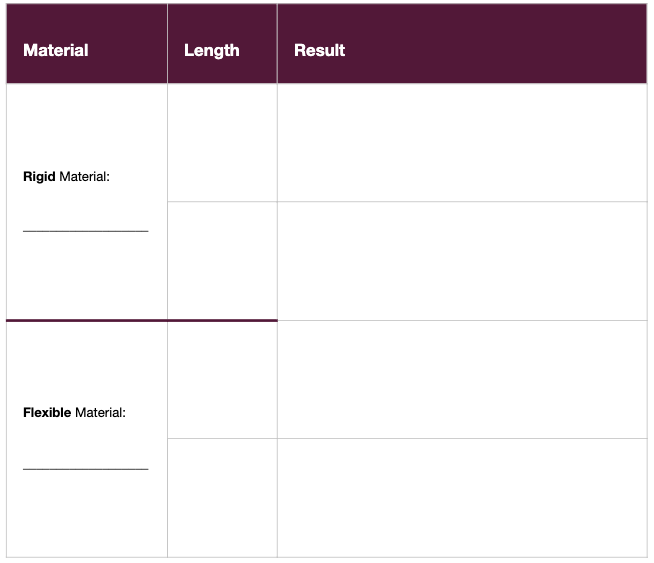
You can experiment with rigid materials (you may already have a yardstick or dowel in your home that would be the right size) or flexible materials (rope, string, or even the leash for a real dog).

You can test your materials by having a friend or family member hold the other end of your harness and lead you slowly around your space while you close your eyes. Have them stop, start, and turn a few different directions during your test. Which material makes it easiest to feel the changes in motion?
Record your results in a table like this.

Now that you know what materials work well for a harness, design your own. How long should your harness be? How will you attach it to your GoPiGo? Create a sketch of your harness on a piece of paper.
3. Build

The GoPiGo has more than one port for attaching input and output devices, and although the cords on all these devices fit into all the connectors, the sensors will not work if plugged into the wrong port.
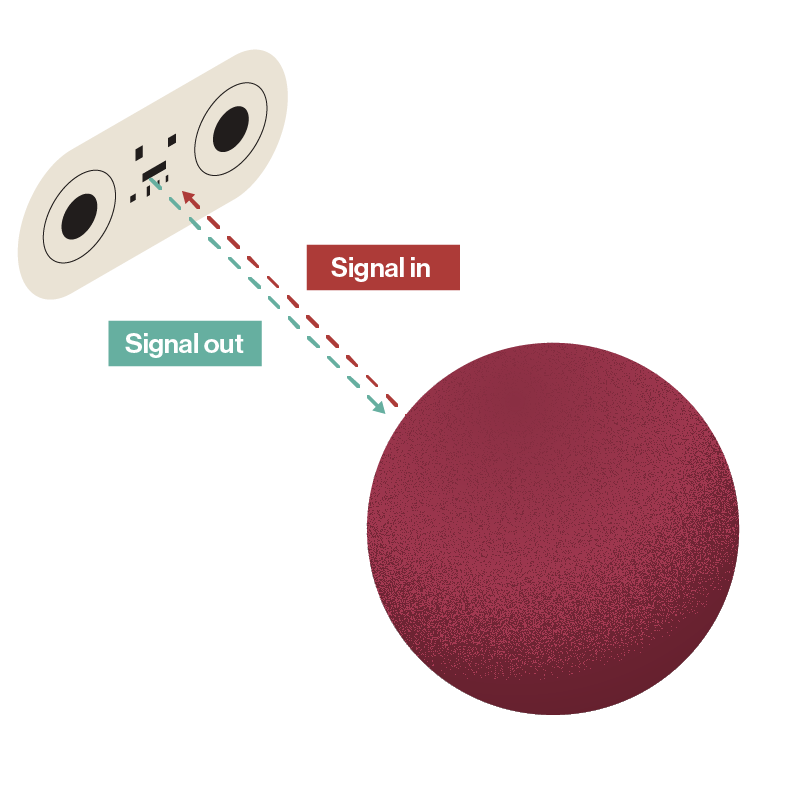
Begin by plugging the distance sensor into one of the two I2C ports on your GoPiGo.
Now think carefully about where and how you attach the sensor to the robot.
The distance sensor works by sending light out to bounce off of obstacles. If your sensor is pointed at the ceiling, the floor, or behind the robot, your robot will notice obstacles in those directions, but that might not be the most helpful information for the human you’re trying to help.
Finally, build and attach your harness to your GoPiGo.
Test your harness using one of your earlier programs to make the GoPiGo move forwards or using the controls under 'Drive'.
Make sure that your harness is not in the way of the wheels and does not block the sensor.
4. Design: Obstacle Avoidance Program
Now design the program for your robot. Here are some questions to consider:
- How close to an object should the GoPiGo get before it reacts?
- How should the GoPiGo react to an obstacle? Should it stop? Turn? Back up?
- What else could your robot do? (Light signals, perhaps?)
5. Code
Before you can code, you need to connect to your GoPiGo. Once you are connected to your robot, click on the "Code in Advanced Bloxter" button. 
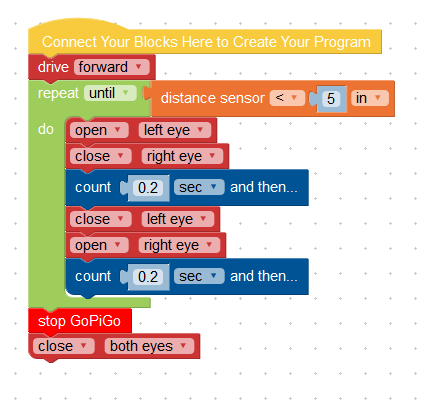
Our first prototype is going to lead the handler (you) forward until the robot gets too close to an obstacle. Then, the robot will stop. We’ll help you get the code started, but it will be up to you to figure out how far away the robot should stop from the obstacle.
There are a few different ways to give this command to the GoPiGo.
First, there’s actually a single block that can create this behavior.Look for the red drive [forward] [while] block. Change the [while] to [until].

Notice that the drive forward until block requires a true value. We will need to overwrite that default true block with a block reading the distance sensor but will also give us a true or false and not a number.

Take the distance sensor in port [I2C] < [5] [in] block and drag it so it falls into place where the default [true] block is.

If you use that block, all you need to do is tweak the distance that the robot stops before it gets to an obstacle. You can change the distance to what you want, and you can also switch to metric if you are more comfortable.
But if you want the most flexibility (think: blinking lights, or rainbow lights), you’ll want to choose a repeat [until] loop. It’s a green block. You can still use the repeat [until] loop, even if you don’t put anything inside of it. It sounds totally crazy, but an empty loop is still a correct way to write code sometimes!

Choose which version of the repeat [until] block that you want to use, and try a few different programs!
Here's one example from the Modular Robotics labs:
6. Test

If you want a quick and easy test for your program, try flipping your GoPiGo onto its back and running the program while you move your hand closer and closer to the sensor. Hopefully, you will see the motors react in the way that you planned.
The most important thing to test in this program is how far away the robot should stop from an object. Put one obstacle in your space and walk with your robot directly toward it. Do you stop before you trip on it?
7. Iterate
Is your robot doing what you expected?
If not, you have a plan for your first round of iteration. Take another look at the example program and make sure you have test obstacles that are easy for the robot to find. Watch the sensor readings on Bloxter as your program runs. Do the distances make sense to you? [image]
If the program is working as expected, it is time to choose an area for improvement.
If you are really fascinated by creating a robot that can navigate through a path with multiple obstacles, you might be interested in experimenting with a second or third distance sensor, and maybe even a maze!