03 Mission Instructions
| Site: | GoLabs |
| Course: | GoBox |
| Book: | 03 Mission Instructions |
| Printed by: | Guest user |
| Date: | Tuesday, 21 July 2026, 1:23 PM |
Description
Your mission is to develop a robot that mimics how an animal responds to light in its environment.
For additional Biomimcry resources, check out the GoBox course summary page.
1. Problem
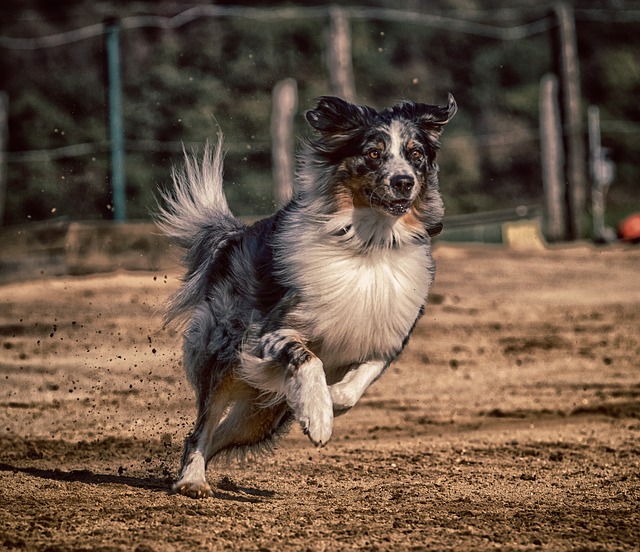
Have you ever watched an animal? Maybe you’ve seen a pet run excitedly to their food bowl at meal time, or accidentally startled a rabbit who ran away from you. Maybe you’ve been to a zoo or park recently and can picture other animal behaviors like lizards laying in the sun, or birds bobbing for fish.
Animals seem very different from the robots we’ve been programming. Our robots do exactly the same thing every time we run the program — following each of our commands in the same way. Animals seem totally unpredictable – never doing exactly the same thing twice. Is it even possible that a robot could copy an animal’s behavior?
To answer this, we need to think about what animals are doing in the world. Animals respond to information they gather with their five senses. They may listen for sounds that alert them to predators, move towards the warmest spot on a rock to raise their body temperature, or sniff the air for the scent of their prey. All these behaviors in animals are driven by information gathered from the world around them.
Remember that robots can gather information from the world around them, too. They use sensors instead of eyes and ears, and they can react in many ways like using motion, lights, or sounds.
There are even robots that try to behave like animals. Biomimicry is the name of a real scientific field that helps scientists solve problems by using strategies from nature. Studying how animals move through the water might help us design faster and more efficient submersible vehicles. Understanding animal (and plant) responses to light might help develop better technology to efficiently collect solar energy.
Today, you are an engineer working to develop a robot that mimics how an animal responds to light in its environment.
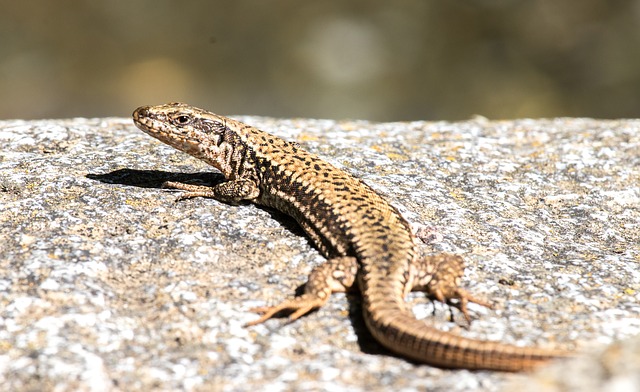
Maybe your robot creature will be timid and nocturnal, fleeing from the light and finding dark places to hide. Or your robot creature might be cold-blooded, following the sun to find a warm place to nap.
You might have your own idea that will help you create a robot creature that behaves in its own unique way. No matter what animal you choose, your work on this project could help develop more creative solutions to solar energy problems in the future.
2. Design
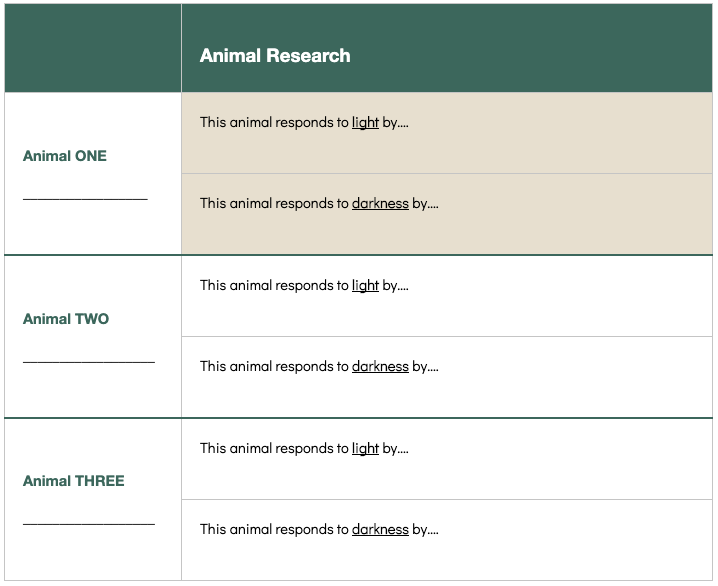
Brainstorm a list of three animals that respond to the amount of light in their environment. Be specific — think about exactly what these animals do in light or dark situations.
Next, choose one of these animals to model with your GoPiGo. Of the three animals you brainstormed, which one do you think you can best model with a robot?
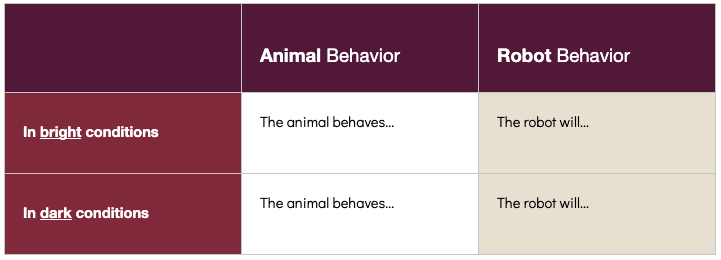
Think about what you already know how to do with the GoPiGo – moving forwards and backwards, stopping and starting, blinking the LEDs. Keep your plan simple to start. Add to your research table with the behavior your robot will mimic.
3. Build

For this mission, you'll use the Light and Color Sensor, and you will need to attach it to your GoPiGo using zip ties or the Sensor Mount.
Think about logical places to attach your sensor — a light sensor mounted underneath your GoPiGo will get a very different light reading than one on top.
The GoPiGo has more than one port for attaching input and output devices, and although the cords on all these devices fit into all the connectors, the sensors will not work if plugged into the wrong port. When you are ready to build, start by plugging your Light and Color Sensor into an I2C port on your GoPiGo. Attach it securely and complete the rest of your animal build.

You may also want to use other materials to give your GoPiGo the shape of the animal you are modeling — you can use the materials that came in your GoBox this month, and any other supplies you have around your house (but get permission first)!
Depending on the animal you chose, you might also build a small cave or fort for the animal to retreat into.
Save the extra zip ties and supplies you received for future missions. You should have plenty to last through all of GoBox!
4. Code: Find Your Threshold
Before you can code, you need to connect to your GoPiGo. You can complete this Mission without Advanced Bloxter.
In order to create a robot that responds to light in the environment, we need to learn a little bit about how the light sensor itself perceives the environment.
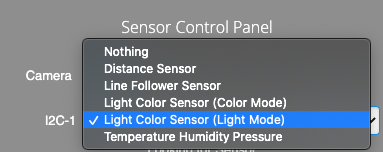 First, we need to find out what the light level is where you are now. Using the drop down menu on the right side of the page, select the port your sensor is attached to (I2C-1 or I2C-2), and choose "Light Color Sensor (Light Mode)".
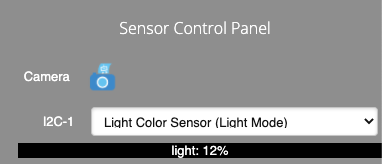
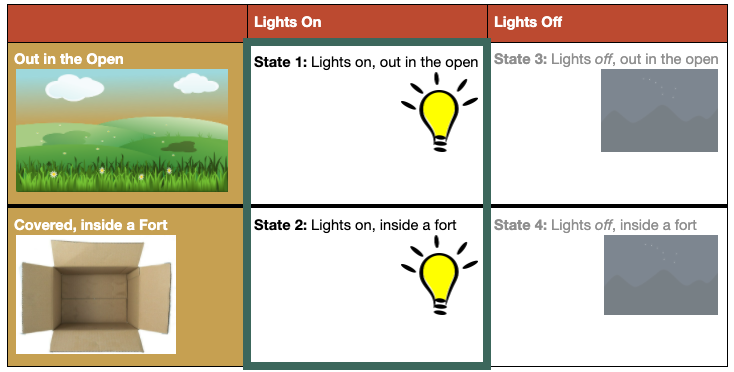
Below the dropdown will be the current light sensor reading. Try covering the sensor on your robot with your hand and you’ll see that this is a live-stream of the sensor data.
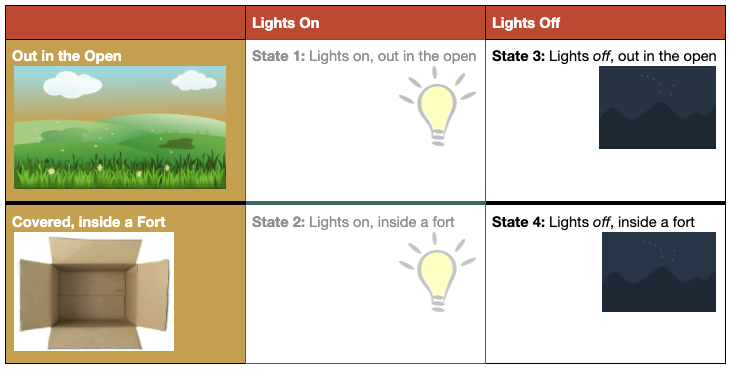
Now write down the numbers you see when the robot is in each of these states.
5. Code: Program Your Animal
Let’s look back at your plan. You already decided what your animal would do in response to light and darkness. To turn this into code, you will be using a conditional statement. Conditional statements are how programmers tell robots to make decisions. “If you see light, then start dancing!”
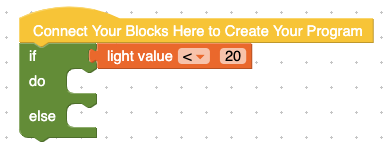
To create this code, you need a green if-do-else block, found under Logic. You will then need to connect a sensor block to the if statement. We will be using the logic statement version of the sensor block, which can be found under "True or False" in the Sensors. Type in your threshold value right now. 20 is the default number in this block, but your threshold is probably a different number.

STOP AND THINK - Order matters in a conditional statement. So let’s try saying it as a sentence using the orange sensor block exactly as it’s listed. If the light is less than twenty, then do________. Otherwise [else], do ________.
So, if your robot is supposed to stay still when it is very dark and dance when it is very bright. Those sentences would sound like this:
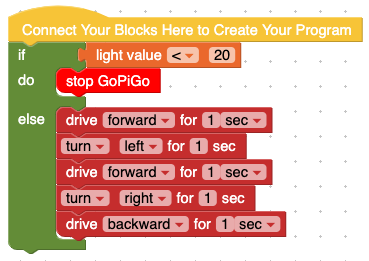
If the light is less than twenty, then Stop GoPiGo.
Otherwise [else], Move Forward, Turn Left, Turn Right, Move Backward.
You already made a plan for what your robot should do when the threshold is reached, so you are ready to fill in your own conditional statement.

You might need to change the inequality sign too. When the “alligator mouth” is facing the number, it means less than. When the “alligator” is facing the words, it means greater than. Still not sure? Dive in and program your robot with the block as-is. You can always change it later!
6. Test
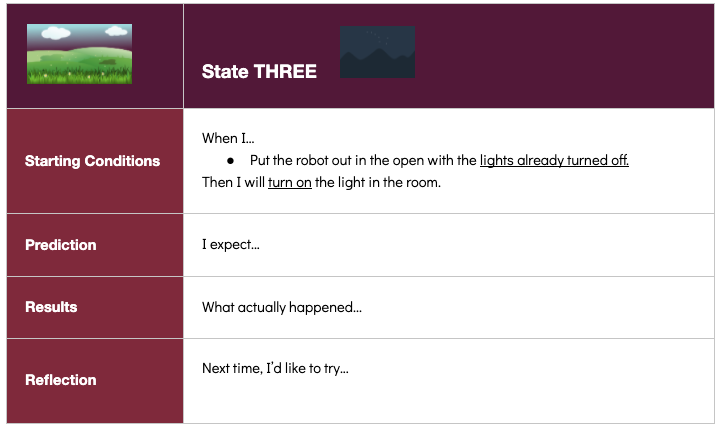
Time to set up your test conditions. Try experimenting with different starting conditions.
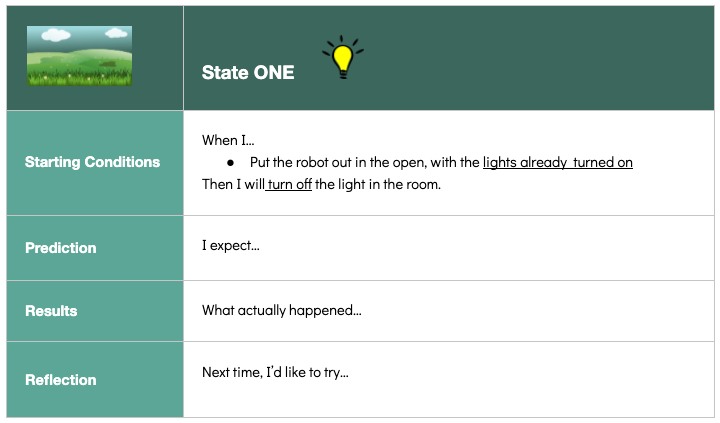
Does your robot do something different when you run the program with the lights on or off ? If not, you may need to adjust your threshold value.
Maybe your robot is responding to light, but not in the way you planned. Or maybe your robot is working perfectly and you already have ideas for making it better. Before making changes, test your program and record the current behavior.
Save your program before you make any changes.
7. Iterate
In order to make your animal seem more animal-like, let’s add a random aspect to the movement. First, switch to Advanced Bloxter. Then, find a place in your program where your GoPiGo is moving. A real animal would never move at the same speed every time.
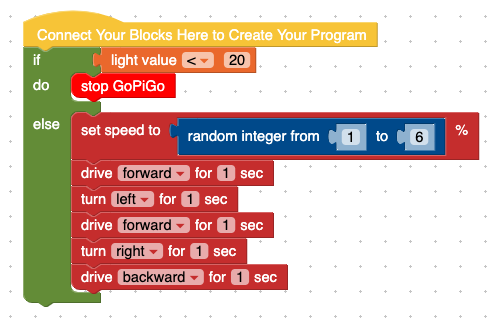
Find the random integer between [1] and [6] block in the Math category, and try adding it to your program.
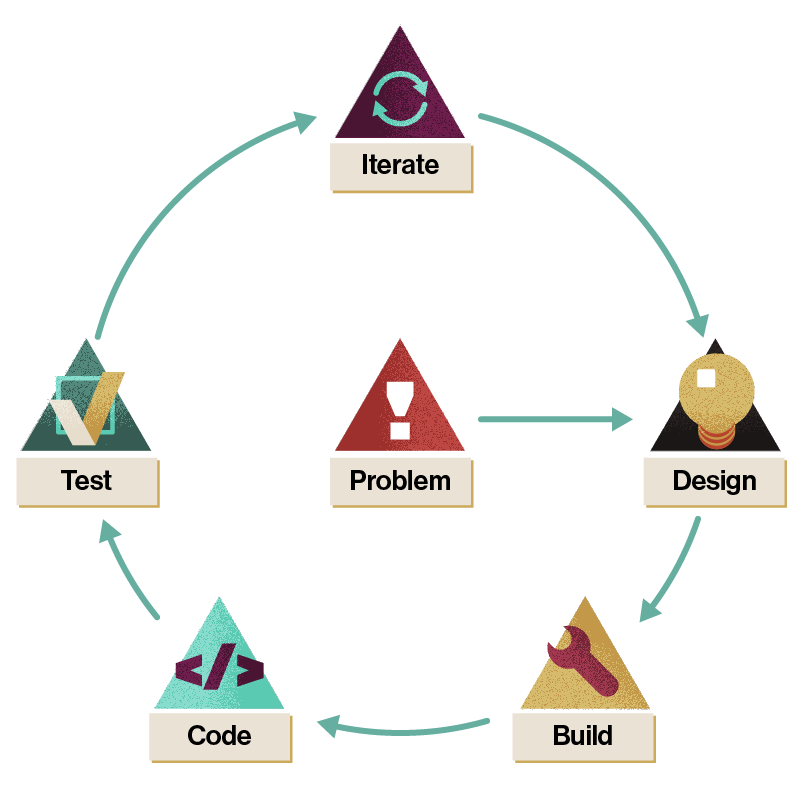
Follow the same steps – Design, Build, Code, Test – for each change you want to make. Make sure you keep track of your work.