Lesson 1: The Engineering Design Cycle
| Site: | GoLabs |
| Course: | Engineering Design Cycle |
| Book: | Lesson 1: The Engineering Design Cycle |
| Printed by: | Guest user |
| Date: | Thursday, 1 January 2026, 8:42 AM |
Description
In this section, we'll introduce the Engineering Design Cycle. Create a course for our robot and discuss.
1. Introduction to the design process
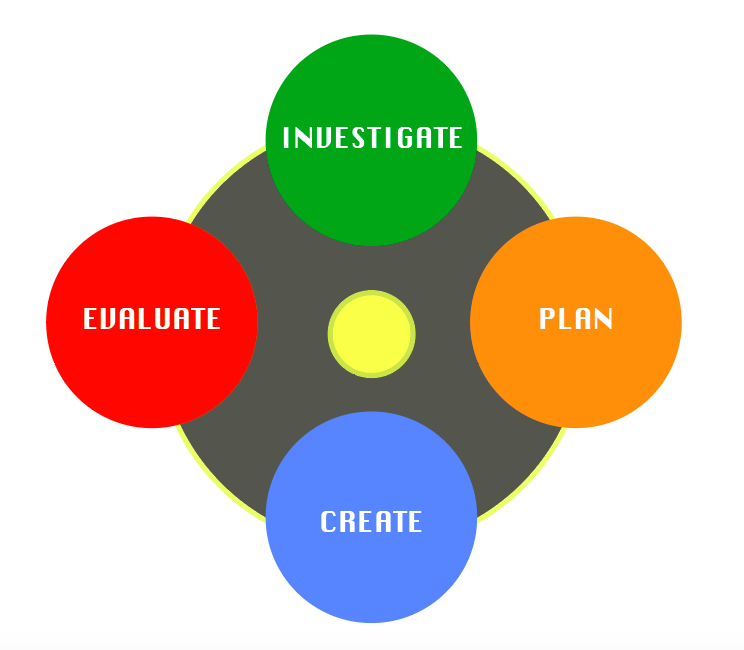
Have you ever thought about where things come from? Certainly, we know that everything starts with raw materials, but who spent the time designing your mechanical pencil or your bookbag? How long did it take them and how many attempts did it take until they had it right. Even the simplest things in life were created using the Engineering Design Process. If you have ever heard a teacher speak about the Writing Process or the Scientific Method then you are familiar with the concept. In the Engineering Design process, you will first define a problem or some challenge that you would like to solve, make a plan for solving it, Create your solution and then Evaluate how well your solution worked. The process is a cycle and is often repeated several times until a prototype or model is developed that solves the problem perfectly. Sometimes the new invention or idea is something completely different than anything anyone has ever seen or heard of and other times it is as simple as a combination of two or more previously created inventions or ideas. If you already have an idea of a problem that you would like to solve or something new that you would like to invent, then you are well on your way to being a successful engineer!
What unique inventions do you use each day that makes your life easier?
2. Create: The Engineering Design Process Course
In this lesson, we will be constructing a model of the design process as part of a "Design Process Course" on the classroom floor for your GoPiGo to drive through. Before you begin building your course, take a few moments to plan out what your course will look like? Will it be constructed of paper signs and stickers or will you use popsicle sticks and Lego people. However, you choose to design your GoPiGo design process course, remember to have fun, and to share ideas with your partners.

3. Create: Build a model and write your code
This step has two parts:
1) Using Paper, colored pencils, and any other craft materials you may have, create a course for your GoPiGo on the floor that explains the engineering design process, Each step of the process should be written on a separate piece of paper or created in some way so that your GoPiGo robot can drive to each step.
2) Write a program for your GoPiGo to run on your Design Process Course.
4. Evaluate: Share and Reflect
Once you have completed your Design Cycle Course and programmed your GoPiGo, it is time to share it with your class and see what they created. We can learn a lot about solving a problem by looking at the methods in which others attempt to solve the same (or similar) problems.
After sharing with the class, did you want to make changes to your code or your course? How effective do you think your design was in explaining the Design Process?
Do you use the engineering design process as you make decisions in your everyday life? When?