Creating your own GoPiGo Parts
| Site: | GoLabs |
| Course: | Engineering Design Cycle |
| Book: | Creating your own GoPiGo Parts |
| Printed by: | Guest user |
| Date: | Thursday, 16 July 2026, 10:52 PM |
Description
In lesson 3 of the Engineering Design Process unit, students will learn how to take the concepts taught in lesson 2 and extend them into their own creations such as customized bumpers or a new way to mount a sensor.
1. Investigate: What else could we make?
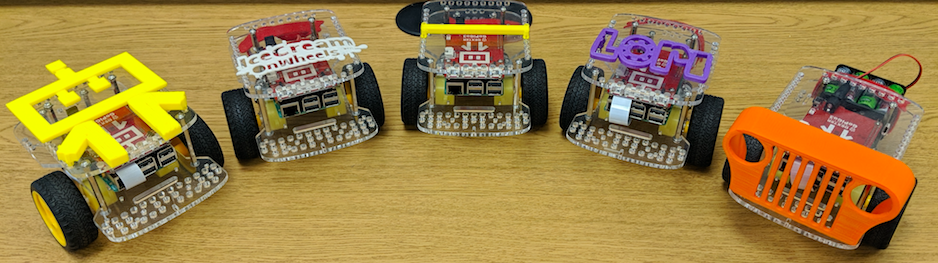
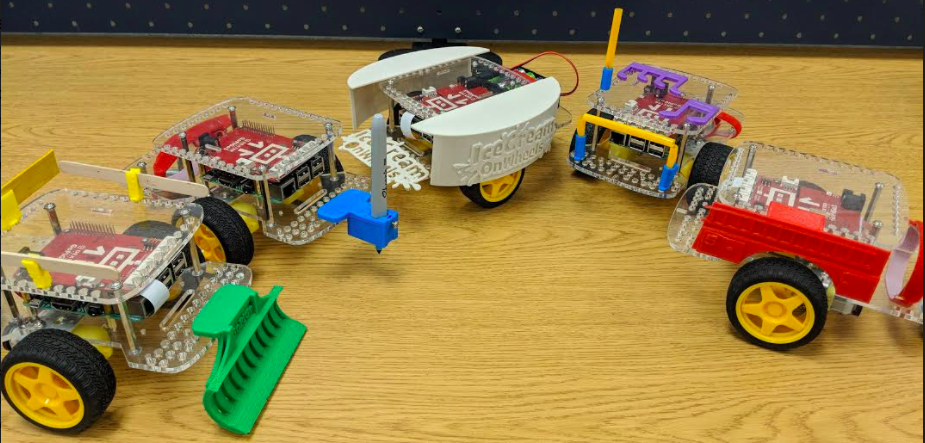
In lesson 2, you have learned how 3d printing can be useful to create a label (license plate, flag, etc) for your GoPiGo. In this lesson, we are going to get a bit more creative and change the look of your robot completely. Using Tinkercad.com you will have the opportunity to create a new front bumper, rear bumper, or side panels for your GoPiGo to make it look like a sportscar, food truck emergency vehicle, or anything else you would like. Perhaps you will develop an entirely new type of vehicle altogether.
2. Investigate: Peg Test
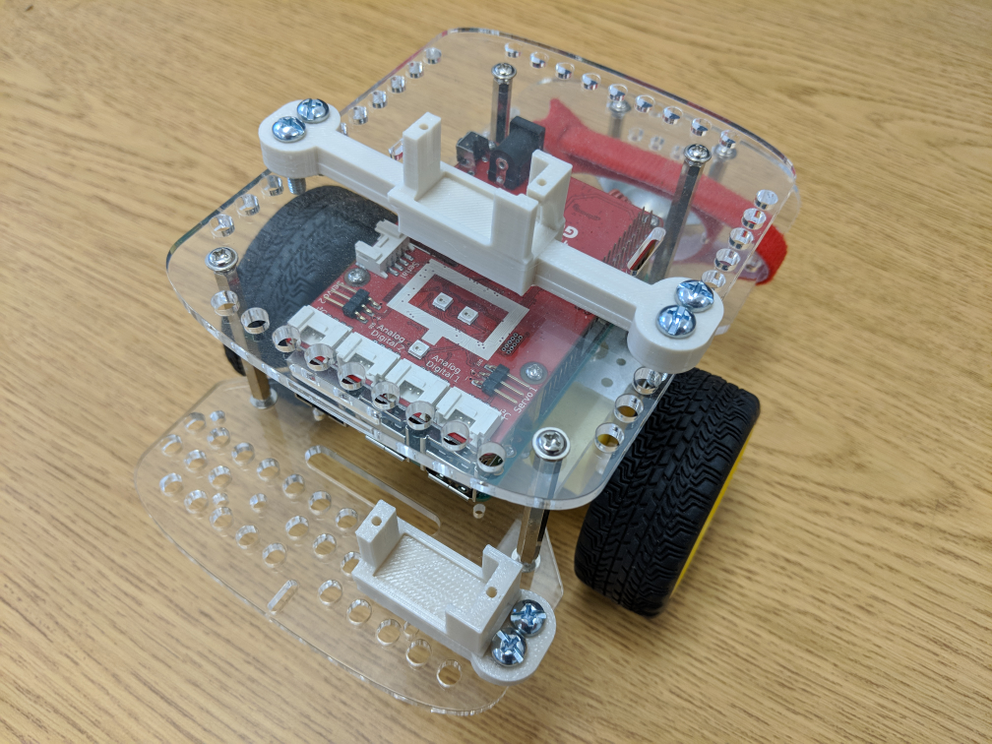
In lesson 2 you designed parts for your GoPiGo using two pegs to attach the parts. However, your GoPiGo has holes that we can attach parts to all over its body. We are not limited to the two holes that the license plate or flag used. Your Challenge in this lesson is to test or research how well one peg works compared to two or three. You may find that one peg is more appropriate for a project than two pegs or three pegs, or you may find that you need the added stability or strength of a second or third peg.
Use the attached worksheet to help compare the different style pegs provided by your teacher.
3. Investigate: Attaching Items across the top
As you observed the different types of Pegs in step #2, did you start to wonder if you could attach pegs in different ways? Using Tinkercad you can create pegs in any position you like. One suggestion is to attaching something across the top of the GoPiGo. Attached is an .stl file with four pegs and a beam spanning across the top. Download the file and import it into Tinkercad to begin using it.
4. Investigate: Attach items with nuts and bolts
The pegs are great because they don't require any extra Hardware. However, the pegs are also very fragile and can break easily. It can also be difficult to design a model that will print correctly without using supports. Nuts and bolts can give us some added strength and make designing a little easier as the bottom of your print can be flat. Using the attached .stl files, download an example that can be attached to the GoPiGo with nuts and bolts and test it out.
5. Plan: Make a Plan
Now that you have some different ideas of how to attach parts it is time to create a plan for your own design. You have two separate options for this and you may want to use both of them to help generate some ideas if you are stuck.
1) If my GoPiGo were.... activity - In this exercise, you will consider a few different types of vehicles that we commonly see on the road and draw how you imagine a GoPiGo would look if it was one of these types of vehicles.
2) Plan Your Own Design activity - Attached is a worksheet to help you make a plan for an original 3d model.
* Both design worksheets have transparent GoPiGo images on them so that students may draw over them.
** Don't feel compelled to stick to just plastic filament Students can incorporate the use of other materials in their design.
6. Create: Build your Designs
When your plan has been approved by your teacher, log in to Tinkercad.com, and begin designing. Feel free to use any of the files attached to these lessons to help you get started.
If you need help refer to the lessons on the Basic Tinkercad Tools
7. Evaluate
How did your design work? Did all of the parts fit correctly and look amazing? If not, how could you rework your design for a more successful print next time? Perhaps adding supports or remeasuring some parts could help. If you are really stuck, try doing some smaller test prints to troubleshoot why things aren't working.
How did you enjoy the process of designing your vehicle parts? look around the room and observe all of the items that had to be designed to fit together so that the form and function of that product could work. You'll likely find several examples (like your mechanical pen) that took an engineer and the engineering design process to create. Would you like to design products as a career?