Instructions
| Site: | GoLabs |
| Course: | Planetary Rover |
| Book: | Instructions |
| Printed by: | Guest user |
| Date: | Saturday, 30 May 2026, 5:08 AM |
Description
Students will create a program that turns their robot into a true rover.
Table of contents
- 1. Set the Speed
- 2. Create Variables
- 3. Create Lists
- 4. Adding Initial Readings to the Lists
- 5. Programming Movement
- 6. Obstacle Avoidance
- 7. Obstacle Avoidance, continued
- 8. Rover Exploration Routine
- 9. Add More Sensor Data to the Lists
- 10. Adding Some Repetition
- 11. Displaying the Data
- 12. Displaying the Data, continued
- 13. Calculating the Mean Average, Part 1
- 14. Calculating the Mean Average, Part 2
- 15. Repeat for Humidity
- 16. Save and Test the Program
1. Set the Speed
** Did you know that the Mars Curiosity has a top speed of 5 centimeters per second on flat ground? The average speed of the Curiosity is 1 centimeter per second. Also, to help ensure that the Curiosity stays safe, it has hazard avoidance software. This tells the rover to stop and check the location every couple of seconds. * (From https://mars.nasa.gov/mer/mission/spacecraft_rover_wheels.html)
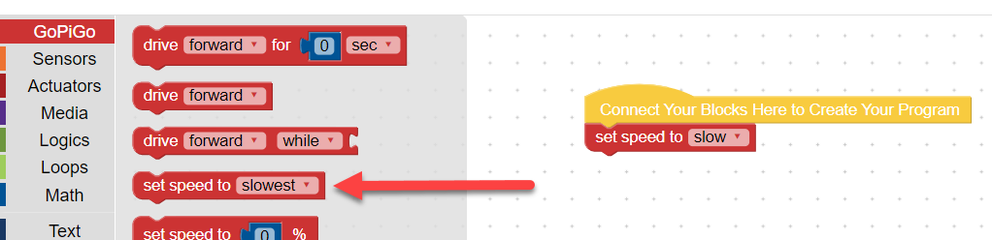
We will start the program by telling the rover how quickly to move. Use the set speed to (slow) block found under the GoPiGo tab.
2. Create Variables
Next, you need to create variables for the temperature data and humidity data. A variable is a place to store data. Just like in math, where variables are used to represent an unknown number, the variables in our program will be used to store the temperature and humidity values that we do not yet know.
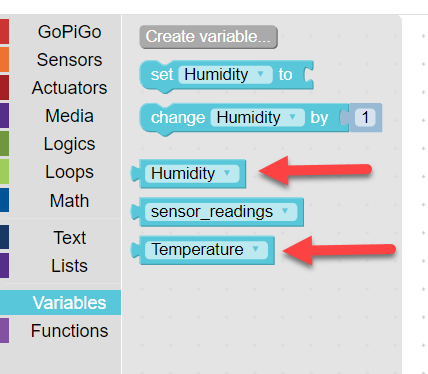
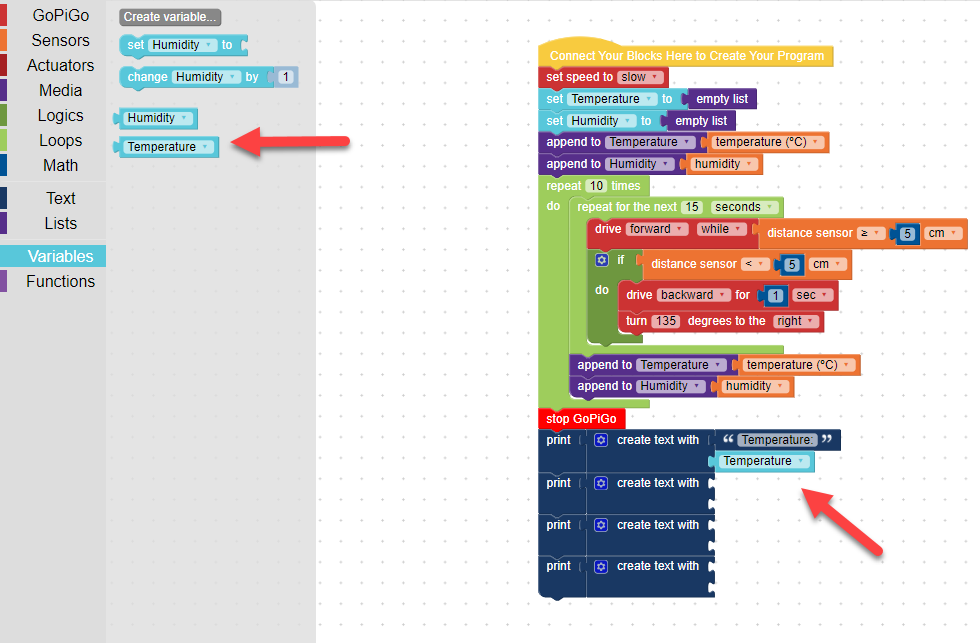
Click on the Variables tab and then Create variable.


A popup window will open for you to name your new variable. Type in “Temperature”. Repeat this process to create a variable for Humidity as well.

When you have finished, you should have two new variable blocks - one for temperature and another for humidity.
3. Create Lists
Now create lists to put the data for temperature and humidity. To do this, click on the Lists tab.
The first block you will need is set (sensor_readings) list to. You will need two of these blocks - one for temperature and another for humidity.
Then, set each of these lists to an empty list by connecting the empty list block to it.

4. Adding Initial Readings to the Lists
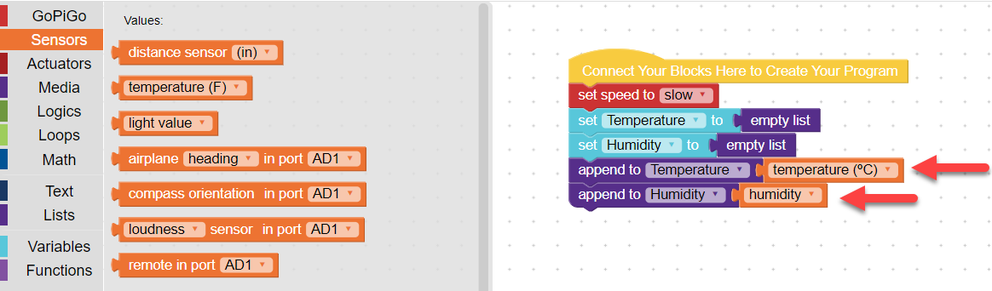
Next, you will add blocks to add an initial temperature and humidity sensor reading to the lists. To do this, you will use two append to (sensor_readings) blocks found under the Lists tab. Be sure to change the name of the list.
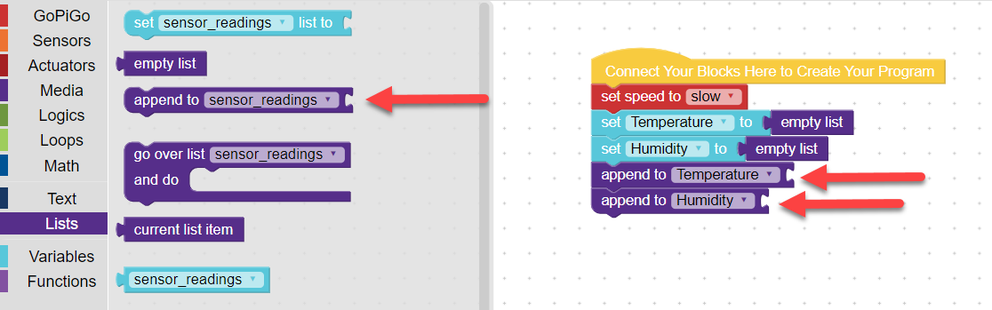
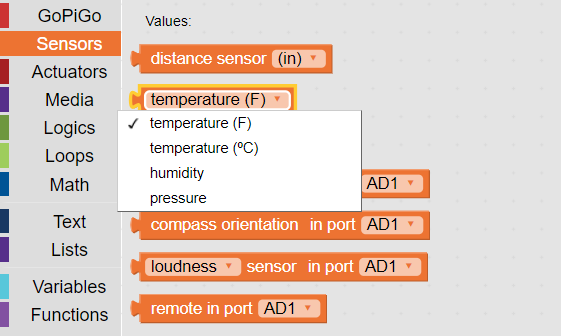
Then, attach a block to tell the GoPiGo what to add to each list. Under the Sensors tab, find temperature (°F) block. Using the drop-down menu, select temperature (°C) and connect the block to the append to (Temperature) block in your program.
Repeat this process for the humidity sensor.
Be sure to select the correct sensor value for each sensor block.
5. Programming Movement
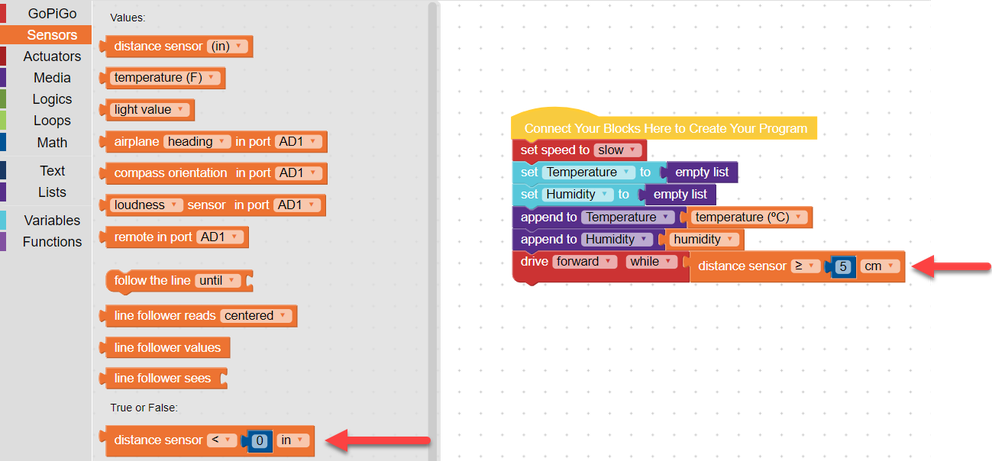
Now, you need to program the GoPiGo rover to traverse the planet, without running into
obstacles, while collecting temperature and humidity data. There are different ways to accomplish this, one is using a drive (forward) (while) block.

Attach block(s) to tell the GoPiGo under what circumstances it should drive forward. Again, this can be accomplished in different ways. One way is to connect a distance sensor block from the true/false category.
Change the inequality symbol and distance values to reflect under what conditions you want the GoPiGo to continue to move forward.
6. Obstacle Avoidance
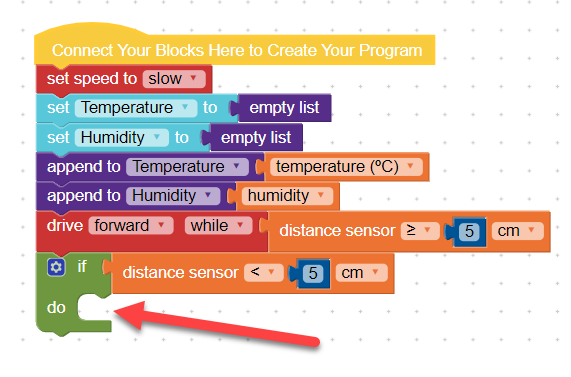
Next, we will tell the GoPiGo rover what to do if it gets too close to an obstacle using a if - do block (found under the Logic tab) connected to another true / false distance sensor block (found under the Sensors tab).


How close to an obstacle should your GoPiGo rover get before reacting? Is 5 cm too close? Too far away?
7. Obstacle Avoidance, continued
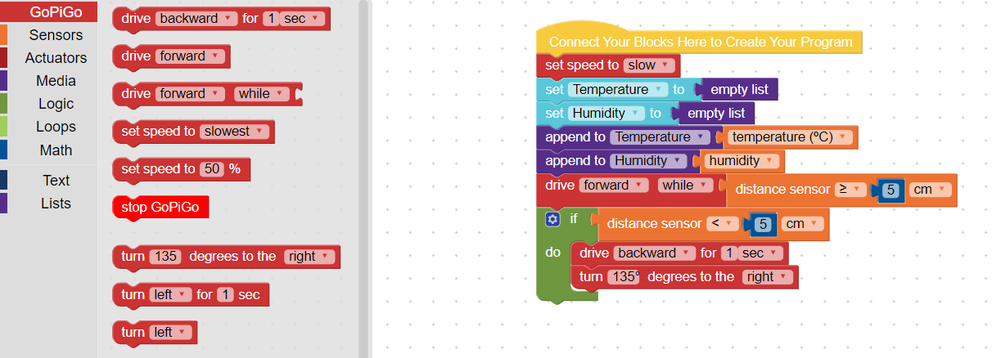
Now, connect blocks next to “do” to tell the GoPiGo what to do if the parameters are met.
Do you want the GoPiGo rover to stop? To turn around? Drive backwards?
Here is an example:
8. Rover Exploration Routine
Next, you need to decide how long you would like the GoPiGo rover to drive around before taking another temperature and humidity reading. To do this, you will use a loop block found under the Loops tab. You can have the program repeat for a certain amount of time or a particular number of times.
The example below has the GoPiGo rover drive around, avoiding obstacles, for 15 seconds using a repeat for the next (15) (seconds) block. You can change the amount of time the blocks repeat for and the unit of time (seconds, minutes, or hours).

9. Add More Sensor Data to the Lists
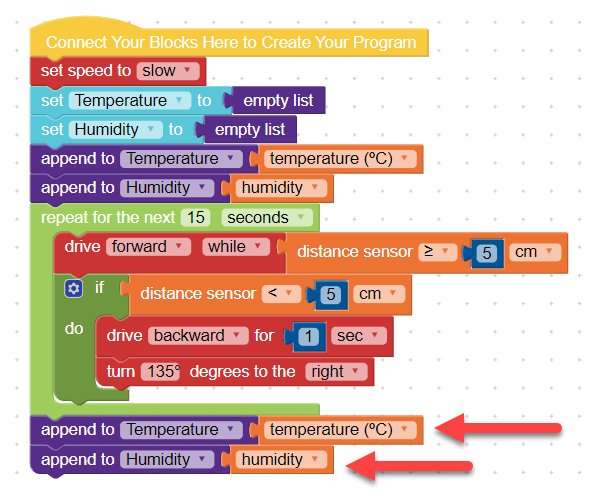
After the GoPiGo rover explores for 15 seconds (or however long you decided to tell the GoPiGo to move), it needs to add another temperature and humidity sensor reading to the respective lists. One way to do this is to right click on the append to (Temperature) + temperature °C blocks and click Duplicate.

Attach these blocks to the bottom of the script. Repeat this process for the append to (Humidity) + humidity blocks.
10. Adding Some Repetition
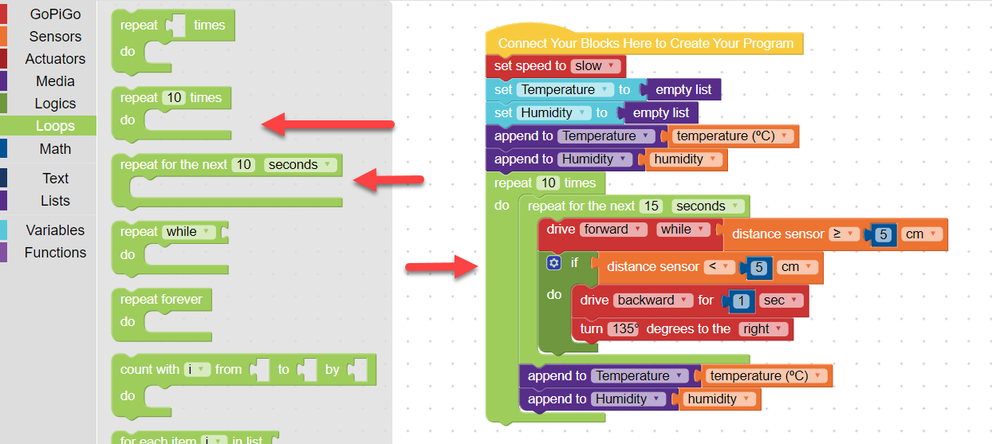
Now it is time to decide how many times or how long the GoPiGo rover is going to drive around and collect temperature and humidity sensor readings. Again, to accomplish this you will use a block under the Loops tab.
You can use a block to repeat the process a certain number of times or for a specified amount of time. In the example below, the rover’s exploration program will repeat 10 times.
11. Displaying the Data
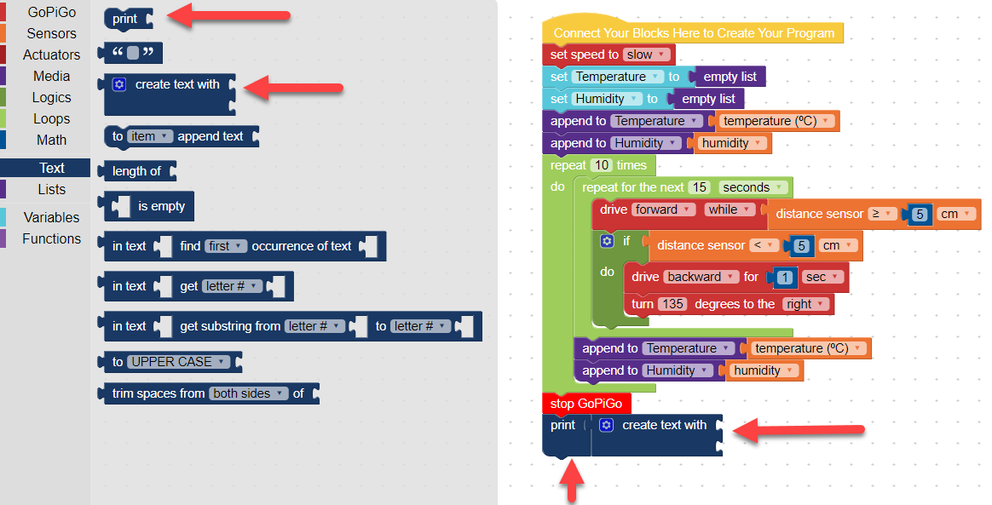
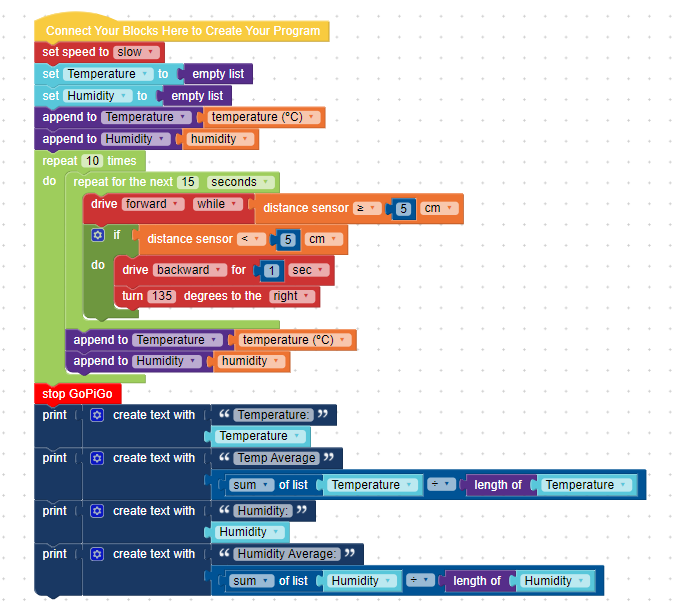
Last, the GoPiGo rover will be programmed to display the data that was collected. First, add stop GoPiGo block.
Now, we will use a print block (found under the Text tab). Since we need to display several different things, connect a create text with block to the print block. This will allow you to print multiple things together.
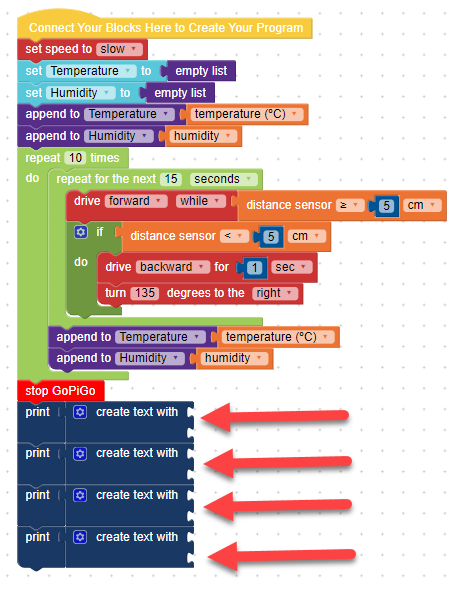
Since the GoPiGo rover is going to display several sets of data, we need to add more of the print block + create text with block. You can do this by dragging individual blocks from the Text tab or right clicking on the blocks in your program and clicking duplicate.
12. Displaying the Data, continued
Now we are going to connect several blocks to the create text with blocks. The first block will be to label which data is going to be displayed. Connect a “ ” block (found under the Text tab). Type Temperature in the block. This will allow you to know which data is being displayed.

Next, we will tell the GoPiGo rover to display all of the temperature readings by connecting a Temperature variable block.
13. Calculating the Mean Average, Part 1
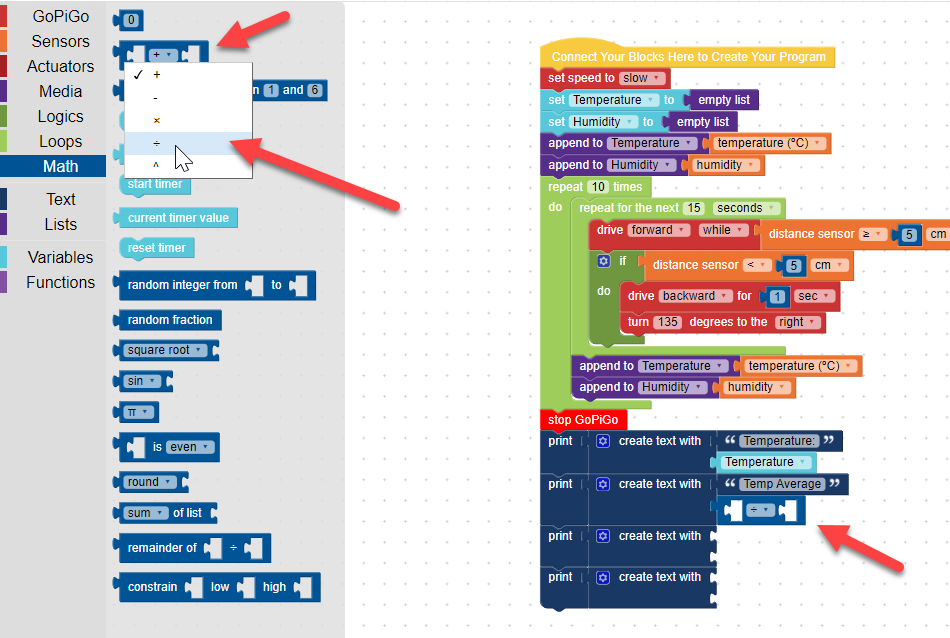
Next, add another “ ” block (found under the Text tab). Type Temp Average in the block. This will tell us what data is being displayed in the output.

Now, we will tell the GoPiGo rover to do some math. We need it to find the mean average of the temperature readings. How do you find the mean of a data set?
Look at the blocks under the Math tab. Think about what blocks could you use to tell the GoPiGo rover to calculate the mean.
14. Calculating the Mean Average, Part 2
The first block you will need is a block to tell the GoPiGo rover to find the quotient of two numbers. Use the drop down menu to change the + to ÷.
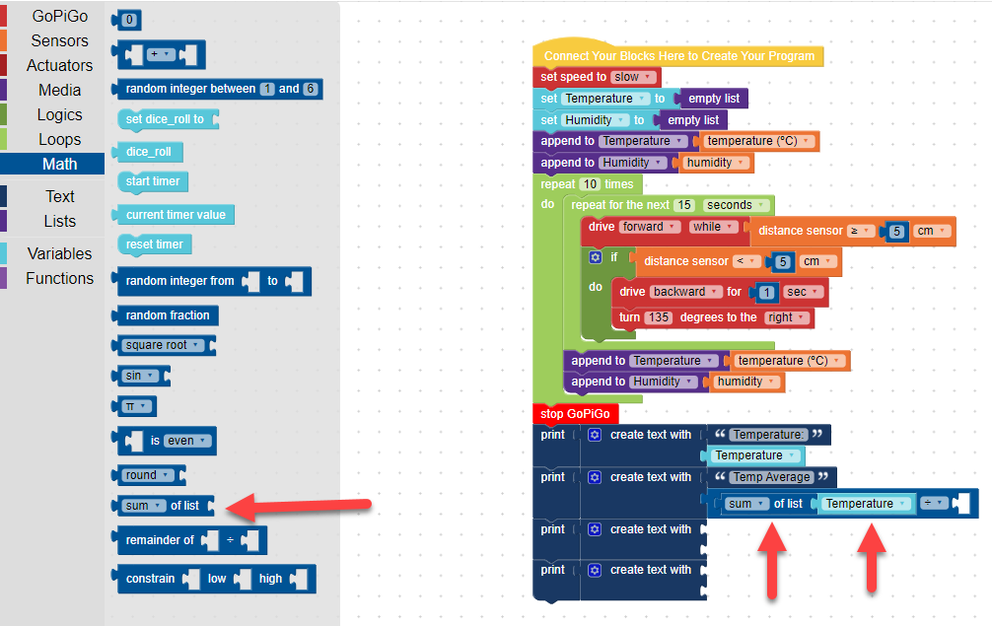
To find the mean average of a data set, you first find the sum of all of the numbers in the data set. Use a (sum) of list block (found under the Math tab) connected to a variable block with the desired list (Temperature).
These two blocks together will tell the GoPiGo rover to add up all of the data points in the Temperature list to determine the sum.
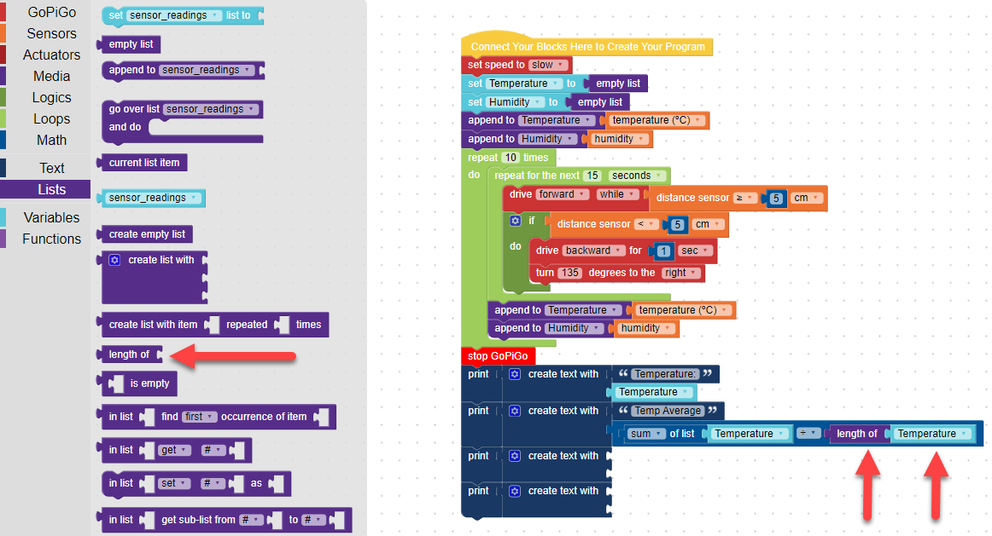
The next step in determining the mean average is to divide the sum of the data set by the number of data points. Since we did not count the number of times the GoPiGo rover took temperature readings and the number of readings will vary depending on how long the program runs, we are going to tell the GoPiGo rover to count for us. To do this we will need a length of block (under the Lists tab) connected to a block for the desired list (Temperature).
This means that once the GoPiGo rover has explored and collected data, it will display all of the temperature readings as well as calculate the mean average of the temperature data.
15. Repeat for Humidity
Set up the printed lists for Humidity just like you did for Temperature.
16. Save and Test the Program
Save your program and then test it.
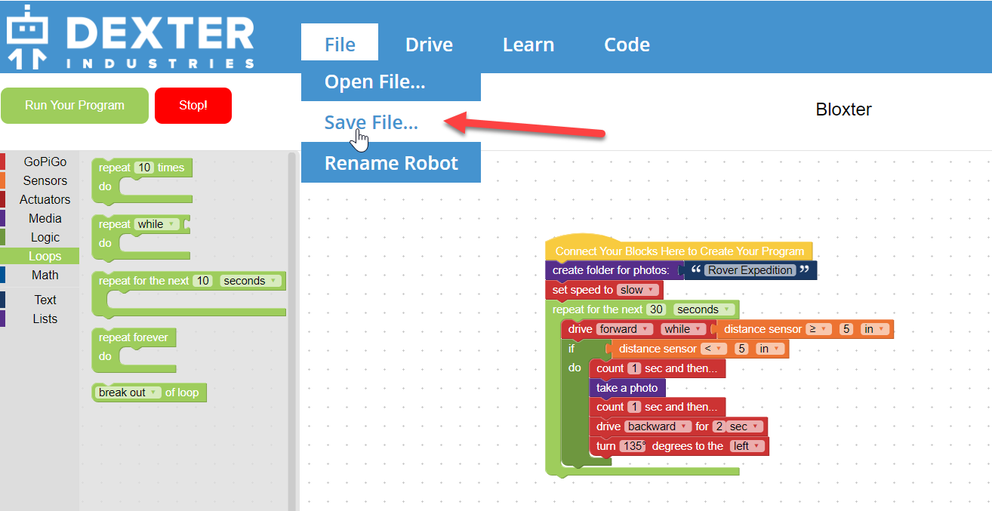
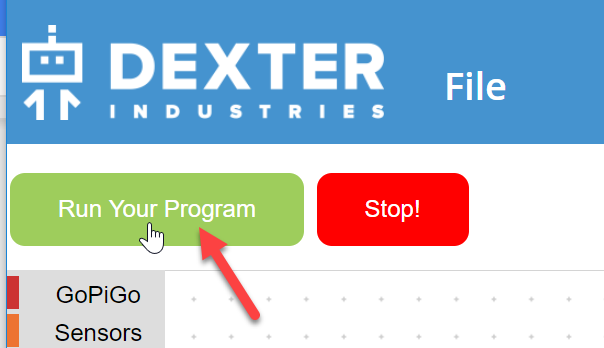
After you save your program, click Run Your Program to begin the program.
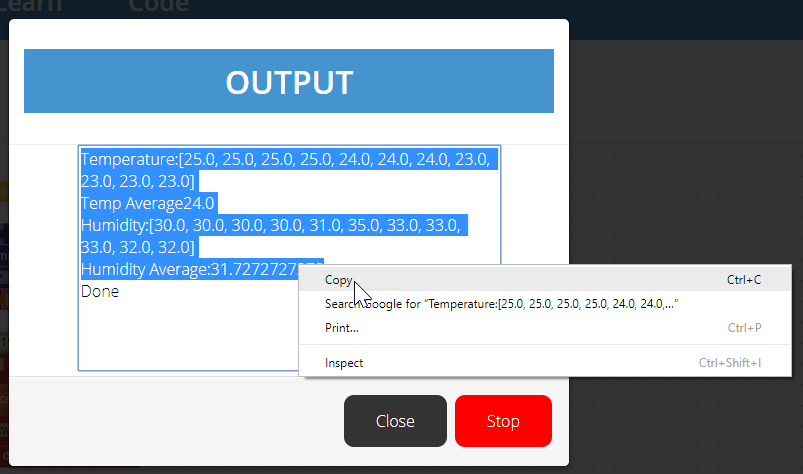
At the end of the program an Output pop-up box will appear with all of your data. ** BE SURE TO COPY THIS DATA AND PASTE IT INTO ANOTHER DOCUMENT (SUCH AS A WORD DOCUMENT) TO SAVE IT. IF YOU RUN THE PROGRAM AGAIN, NEW DATA WILL OVERWRITE THE LISTS. **
Did your program run as expected? What changes do you want to make before your GoPiGo rover is sent out onto the planetary surface to gather data? Make changes as needed. Remember to save your work.