Instructions
| Site: | GoLabs |
| Course: | Planetary Rover |
| Book: | Instructions |
| Printed by: | Guest user |
| Date: | Thursday, 2 July 2026, 9:00 AM |
1. Logging Data
Data logging is the process of collecting data over time. Systems usually collect data using sensors connected to a computer.
How could data logging be beneficial to your exploration of the new planet?
2. A New Way to Collect & Analyze Data
Today you will collect and analyze data using logging blocks. These blocks allow you to store data in a spreadsheet.
First, click on Code in Bloxter --> Advanced Bloxter.

Next, click on the Sensors tab and then Logging. There are two blocks under logging: start logging values in: "log" and log ("__" ) (sensor value).

The start logging values in: "log" sets up where the data will be stored. log ("__" ) (sensor value) tells what data points will be stored and the label for that data point.
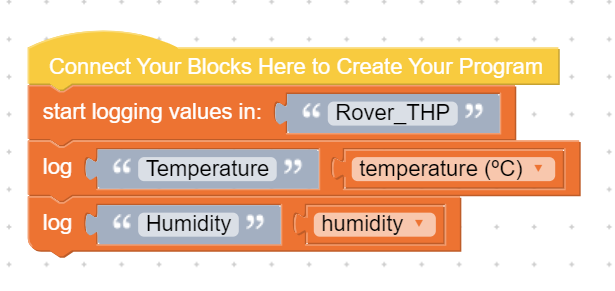
The first block we are going to use is start logging values in: "log". Connect this block and change the "log" name to rename what the log file will be called.

3. Log Sensor Data
Next, you will need to add blocks to tell what sensor data should be logged. Use a log ("__" ) (sensor value) block to do this. Change the description value and the sensor value.

The example below has blocks that log temperature data and humidity data.
4. Getting Started
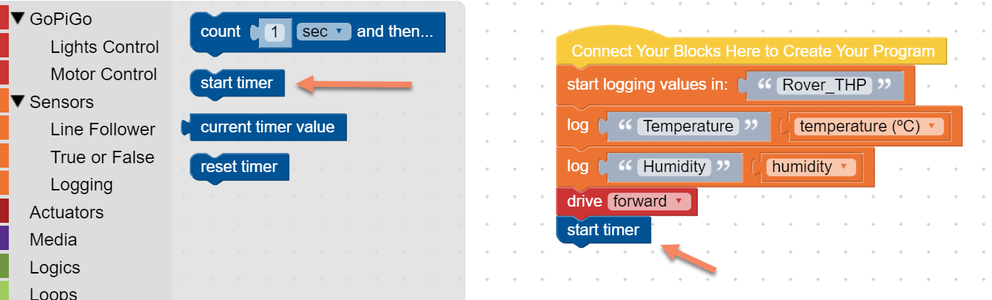
First, tell the rover to go forward by adding a drive (forward) block. You could also add in controls for speed or an indicator using the LEDs to indicate that the rover is starting to explore.

Next, add a start start timer block which can be found under the Time tab. Later in the program we will use the timer to tell the rover when to take temperature and humidity readings.
5. Obstacle Avoidance
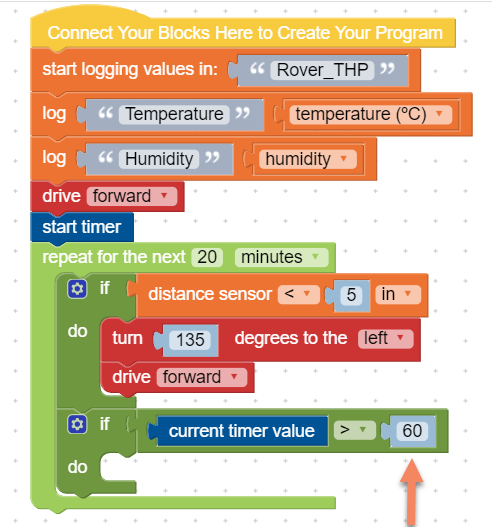
Now, add a loop block to tell the rover how long to explore and gather data. In the example below, a repeat for the next (20) (minutes) block is used.
Within the loop, add in two if-do blocks. For this investigation of the planet we are going to tell the rover to explore the new planet, avoid obstacles while logging temperature and humidity readings.

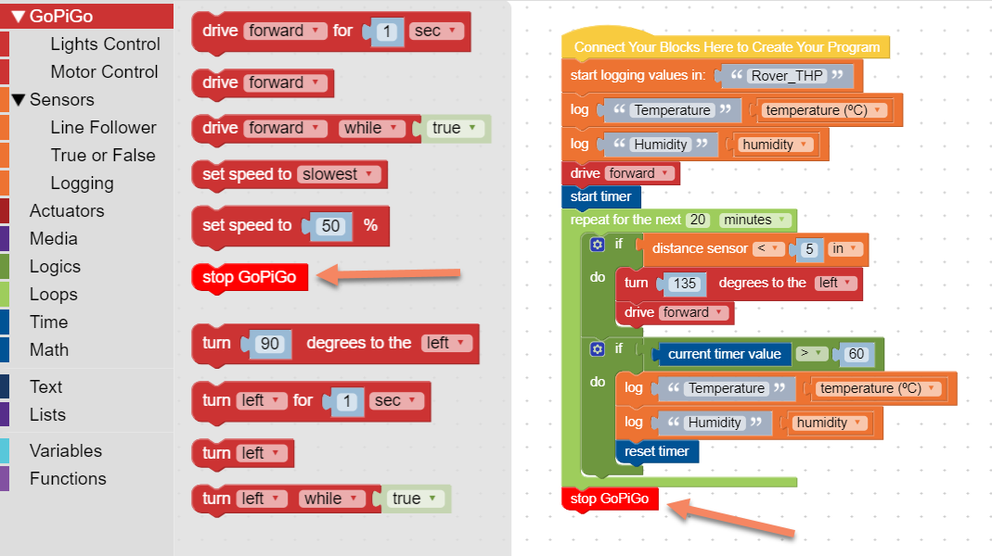
The first if-do block will be for the obstacle avoidance. This is similar to the visual survey lesson. The example shown below connect distance sensor (<) (5) (in) block to the if- and turn (135) degrees to the (left) block + drive (forward) to the do-.

6. Log Data
For the next if-do block you will tell the rover how often to log data and what data to log.
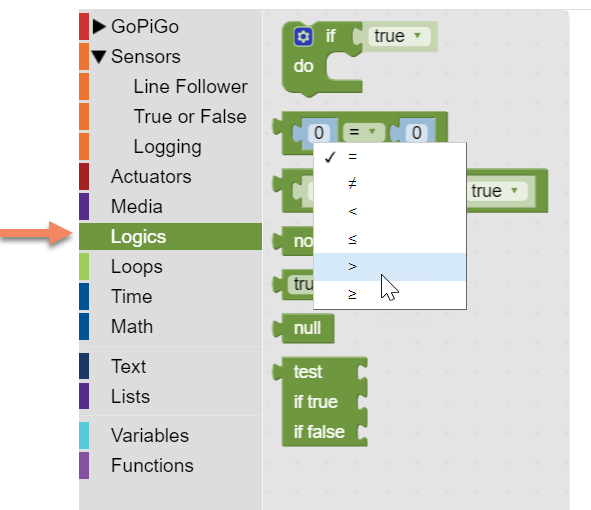
Connect the () > () block found under the Logics tab to the second if-do block. This allows you to tell the rover when to log a reading based on the current timer value.
Add a current timer block and a value to the inequality to determine how often to log data. The timer counts in seconds. The example below tells the robot to log data every 60 seconds.
In the do- portion of this if-do block, tell the rover what data you want logged. You can do this by duplicating the blocks from the beginning of the program or connecting new ones found under the Sensors tab.
The example below tells the rover to log temperature and humidity data each 60 seconds.
After the logging blocks, add a reset timer block to start the timer over again.

7. End the Program and Save
At the end of the program be sure to add a stop GoPiGo block to ensure that your rover does not continue to drive forward once it has gathered data.
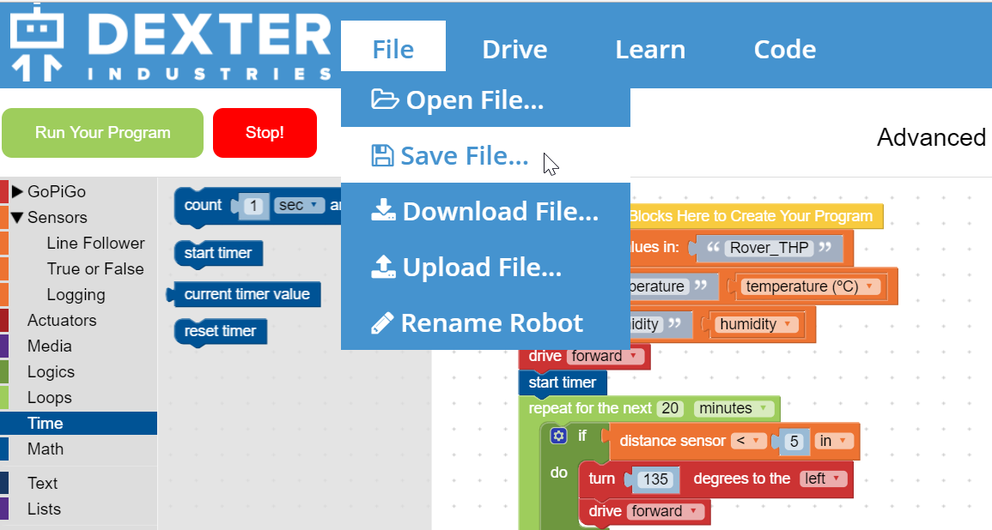
Save your program.
8. Test & Run Your Program
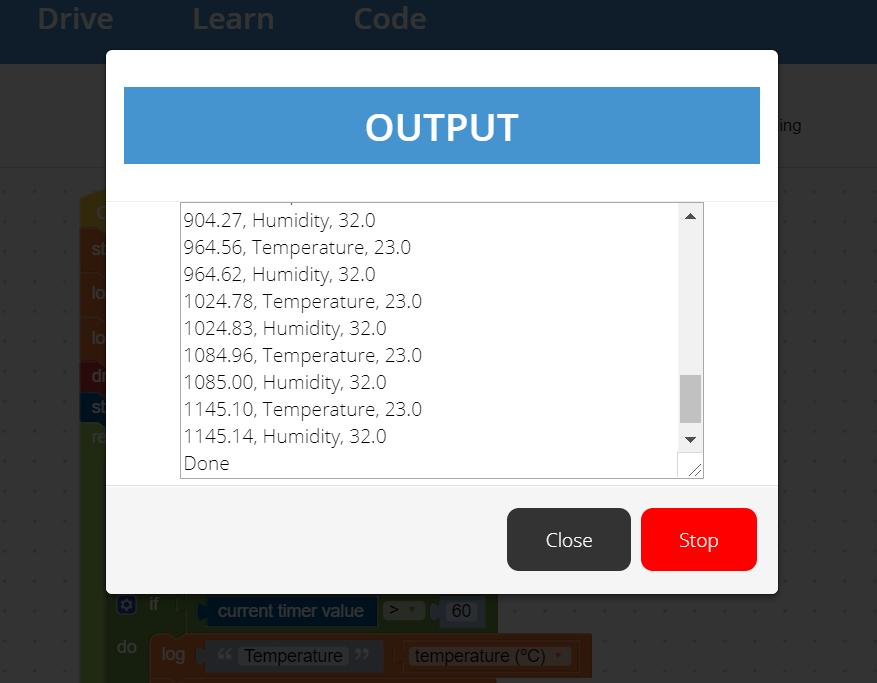
Run your program. While the program is running you will see the data in the output box. This data is also being logged on the USB drive in a spreadsheet. You do not need to copy and paste the data at the end of the program because it is saved on the USB.
Once you are ready to run your program, send your rover to the new planet and collect data.
NOTE: If you run the program multiple times, be sure to create a new name for the log file in your program.
9. Log File Spreadsheet
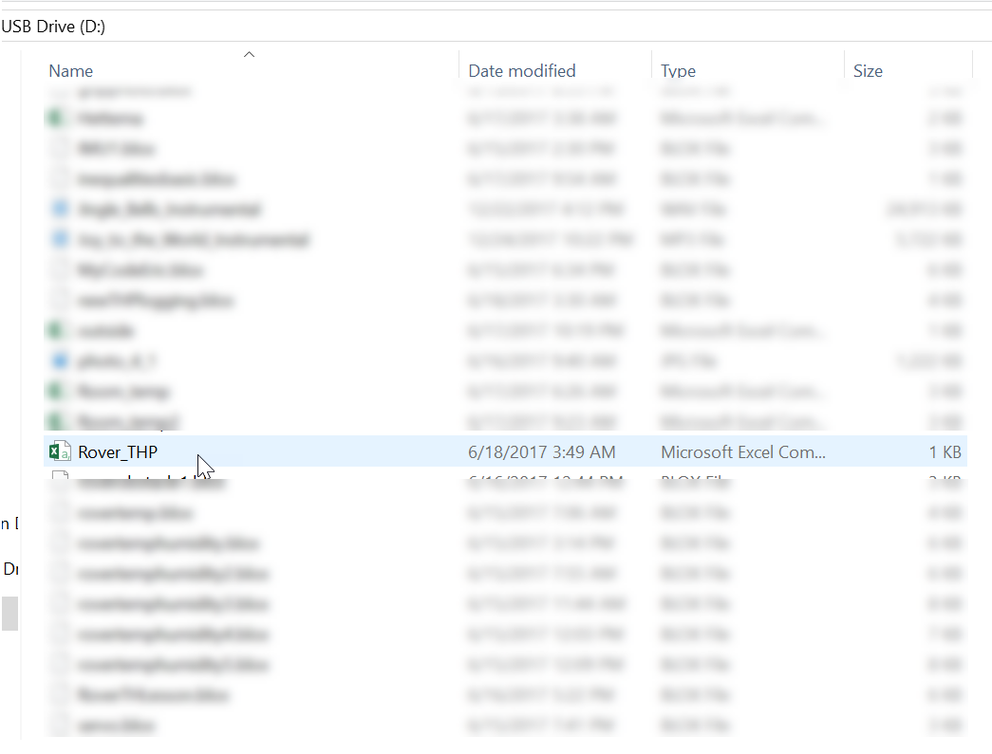
Once the program has run, unplug the USB from your rover and plug it into your computer. Your log file is saved on the USB as a spreadsheet. Find your log file and open it.
NOTE: If you do not have Excel installed, you can upload the file to Google Sheets.
10. Analyze Your Data
With your rover team, analyze your data.

What have you learned about the planet? What questions do you still have? What data do you still need?
11. Display Your Data
Display your data visually to share with other rover teams.
