Room Defender
| Site: | GoLabs |
| Course: | Room Defender |
| Book: | Room Defender |
| Printed by: | Guest user |
| Date: | Wednesday, 29 July 2026, 9:02 PM |
Description
Let GoPiGo defend your room from unauthorized intruders.
1. Introduction
Siblings, siblings, siblings… Especially younger siblings… They sneak into your room, and disrupt your things, when they’re not simply taking them as their own! What you need is to call on the Guardian of the Wardrobe!
Build and program this little GoPiGo robot to protect your wardrobe, your closet, or even your whole room! Hide GoPiGo behind a closed door and when the door is opened, it will attack your siblings, scaring them, and even taking a picture as trespassing proof! That way, even mom will have to be on your side!
2. Materials Needed
- A GoPiGo in working conditions (assembled, with Raspbian for Robots SD Card, and WiFi Dongle activated on your home network, and working batteries.)
- Ultrasonic Sensor
- Raspberry Pi Camera
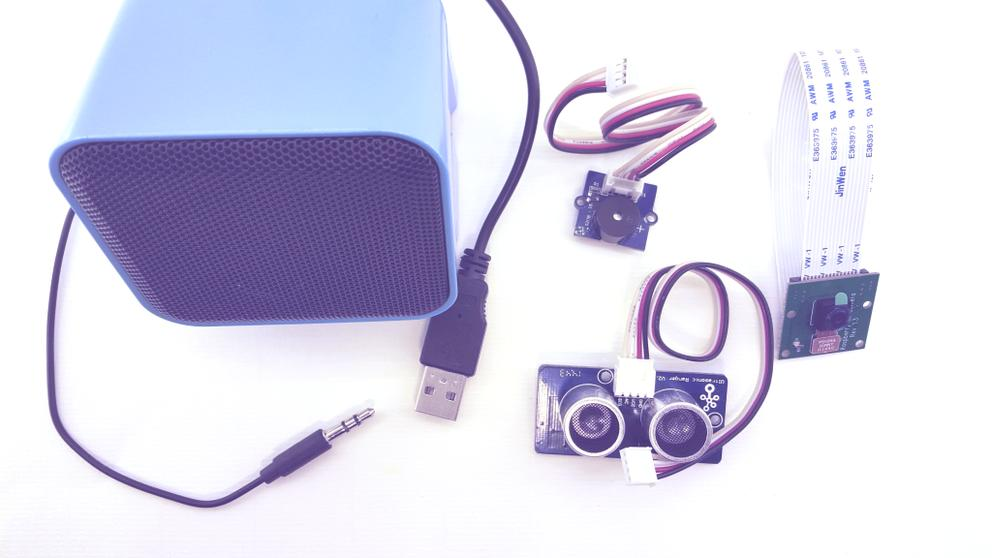
- Grove Buzzer
- Speaker for Raspberry Pi
You can choose to use any of the last three items, or all of them, or none of them. The more you use, the better the protection, but if one is not available, it’s not a deal-breaker. The Guardian will guard without it.
If this is your first project with GoPiGo, take a look at the Getting Started pages before implementing this project.
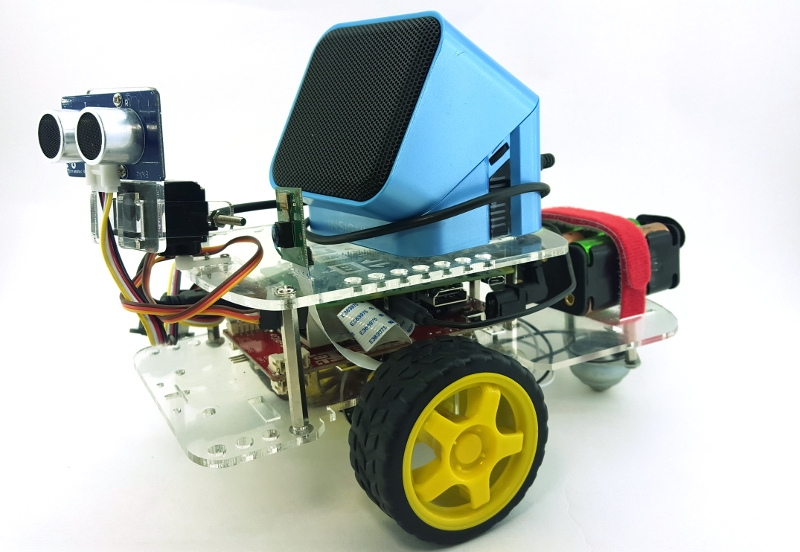
3. Assemble the Guardian
Agent KK, your mission, should you choose to accept it, is to assemble the Guardian by following these steps. We will deny all knowledge of your mission (but if you have questions, feel free to contact us).
- Make sure your GoPiGo is up and running and connected to your home network. Check your batteries.
- Plug the Ultrasonic Sensor into port A1. It doesn’t need the Servo, so don’t worry if you don’t have it. You do need to find a way of attaching the Ultrasonic Sensor in a fairly stable position, pointing forward.
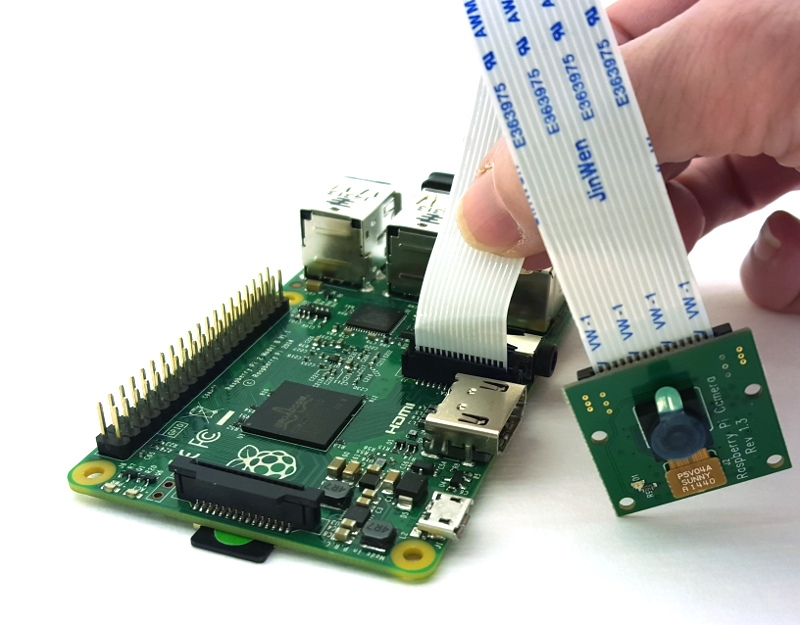
- Plug in the Raspberry Pi Camera. Installing the camera is a bit more time consuming. Please refer to these instructions, especiallyto see how to attach the camera to the Raspberry Pi. You do not need to attach it to a Servo for this project, you can attach it directly to the chassis.
- Plug the Grove Buzzer into Port D11. D11 is underneath the red board, so you have to flip GoPiGo on its back to see it. Attach the Buzzer to the GoPiGo using tie wraps, or any other method that you have available to you.
- Plug the Speaker into the audio plug on the Raspberry Pi itself. If it’s USB powered, you can use one of the USB ports on the GoPiGo. Otherwise, make sure its batteries are good.
4. Getting the Code
The code for this project is available for both Python and Scratch. Use “DI Update Software” to get the latest versions of our projects (you can find this script on your Raspbian for Robots desktop). Depending on which version you want to use, choose one of the following two methods to access the code. Just don’t execute the code right away as our Guardian is not in position yet.
Scratch:
Launch Scratch through the “Scratch for Robots” interface. If you need help with this step, please follow the instructions described in this tutorial
Click on File/Open (you can also use Ctrl-O for a direct access) to get the File dialog.
Click on the Desktop button, then double click the GoPiGo folder. 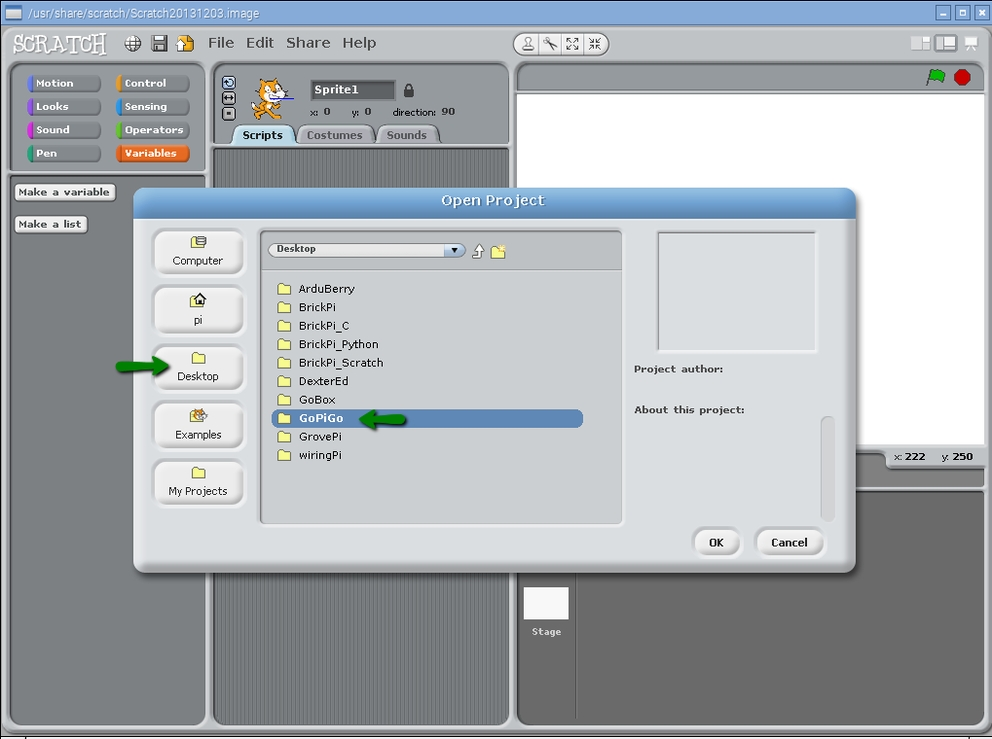
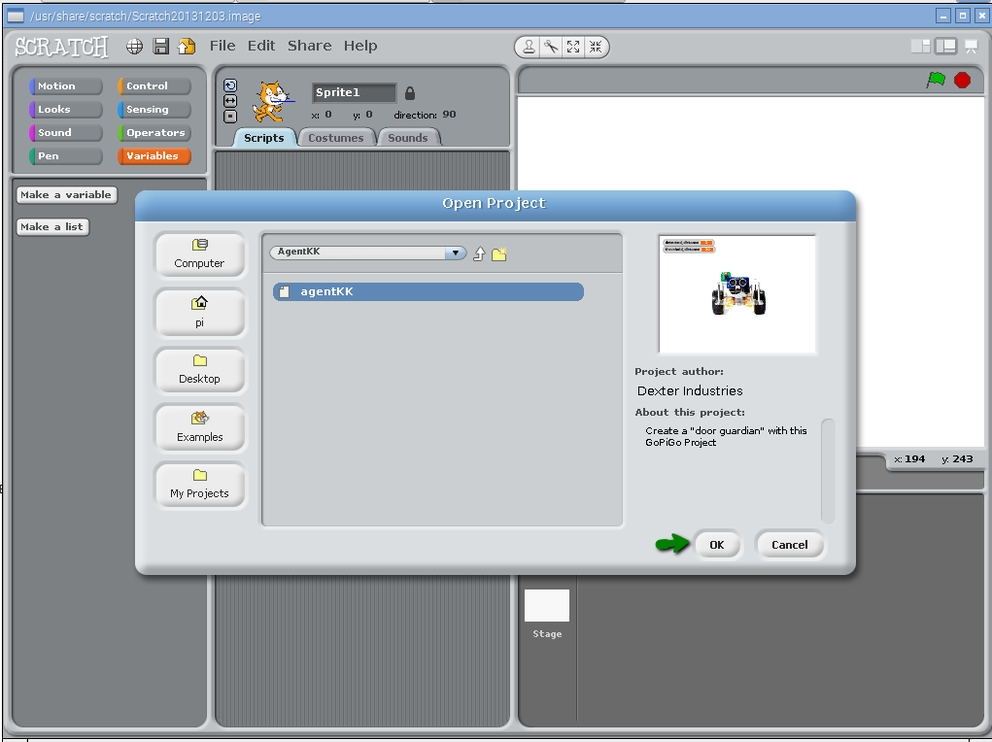
5. Getting the Code
Once inside the GoPiGo folder, double-click the Projects folder, and finally double-click the AgentKK folder.
Choose agentKK and click the OK button to load it up inside Scratch.
6. Python
7. Testing
Let’s verify that everything is working, before sending our Guardian off to do its job.
Start by putting GoPiGo on its back so it won’t run off when it detects an intrusion. Be careful not to hurt the ultrasonic sensor or the camera when you do this.
Place an obstacle in front of the ultrasonic sensor, less than 10 cm or 4 inches away.
Launch the script.
- Scratch: click the green flag in Scratch
- Python:

Remove the obstacle in front of the ultrasonic sensor. There should be plenty of space in front of it now, enough to trigger the attack mode.
Are you getting the appropriate reactions?
- Yelling can be heard through the speaker
- A loud noise comes out from the buzzer
- A photo is taken, it is saved to your Pi Desktop
- The two LEDs on the GoPiGo blink
- The wheels on the GoPiGo turn (and if the GoPiGo wasn’t on its back, it would be going forward)
8. GoPiGo on its Mission
The Guardian is meant to guard a closed door against unauthorized opening.
- Put it behind a door, either a closet, or a bedroom door.
- Start the code remotely via your laptop
- Scratch: click the green flag
- Python:

For an ultimate test, open the door, and watch it go!
9. Code for this Project
The easiest way to get the code is to update your Dexter Industries software through the “DI Software Update”. When you do this, all of the code files for new projects like this will show up!
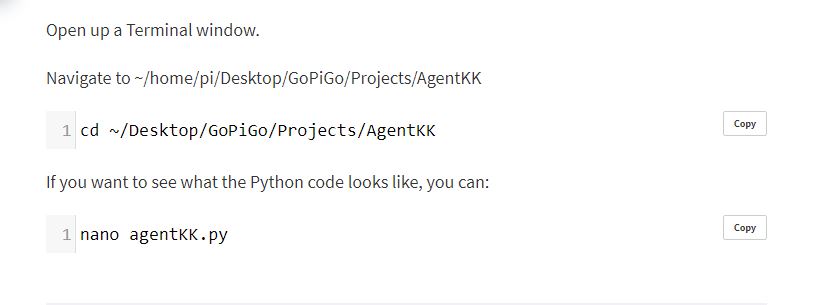
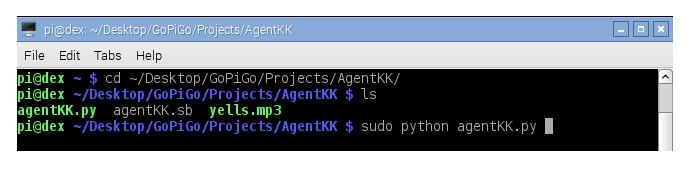
When you run the DI Software Update, this project can be found in this location:
/home/pi/Desktop/GoPiGo/Projects/AgentKK
If you are not using the Dexter Industries custom software, Raspbian for Robots, and you still want to download this project, you can download it here.
10. Questions?
Have a question or a problem? Post it on the forums and we’ll help you out.