10 Mission Instructions
4. Build
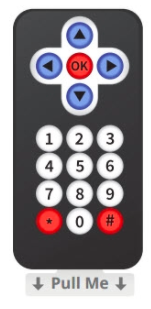
The first step is to activate the remote control. This is a battery operated remote, and there’s a clear plastic pull-tab that protects the battery. You need to remove this plastic tab by pulling it out.
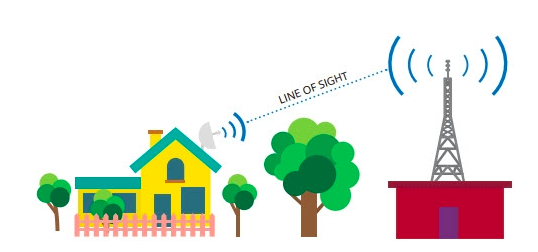
The IR sensor is a line-of-sight sensor, which means it needs to communicate with the remote in a clear path with nothing in its way. If you have any decorations on your GoPiGo, make sure they don't block the sensor.
Now, this line-of-sight concept is a bit deceptive because IR light can bounce off surfaces (like walls). Your TV remote is likely an IR sensor/remote too. You don’t have to point it directly at the TV for it to work, as the signal will bounce off various surfaces.
Warning: If you have a sibling or a friend with a GoBox subscription, note that both of the GoPiGos will receive the IR signals! They will interfere with each other and may cause some confusion or chaos.
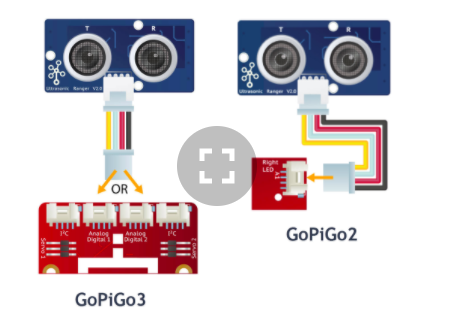
Plug the IR sensor into either of the Analog Digital ports and attach it to the top of the GoPiGo.
Plug the distance sensor into the I2C port and place it on the robot facing in whichever direction you decided in your plan.