Orienteering Project
| Site: | GoLabs |
| Course: | Robotic Challenges with Python and GoPiGo |
| Book: | Orienteering Project |
| Printed by: | Guest user |
| Date: | Sunday, 5 July 2026, 5:45 PM |
Description

This is the first challenge within the Robotics with GoPiGo and Python Curriculum.
Your task is to program your robot to navigate an area of previously unseen terrain to reach its destination, passing through a number of waypoints.
1. Plan Your Route
Think about a route that you would like your robot orienteer to follow and the landmarks that it might pass along the way.
- What everyday objects can you use to represent your landmarks?
- For added fun, be creative and invent some puns. The more groan-inducing the puns, the better!
For instance:
- a bag of cough drops could represent a local coughy (coffee) shop
- a soft toy sheep and a pair of scissors could represent a baaaa-ber (barber) shop
- a herd of model cows could represent an agricultural moo-seum (museum)
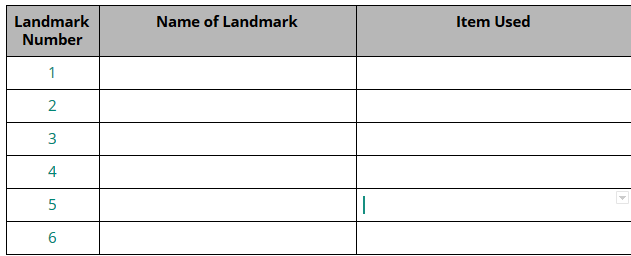
Create a table like the one below and list all of your landmarks in it in the order that they will be visited by your robot orienteer.
We recommend that your map has at least 5 landmarks, including your start and end point, but you can have more if you like.
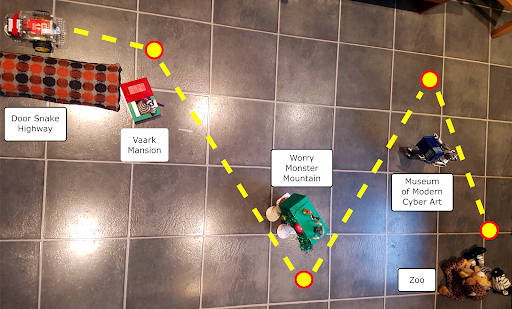
2. Make Your Map
Make a physical map for the robot orienteer to navigate its way around by placing the objects that represent your landmarks on the floor.
MAP SIZE: An ideal floor area for your map is 2.5m x 2.5m or 10 feet x 10 feet. We don’t recommend you go much smaller than that but you can go bigger if you have space.
LANDMARKS: Place your landmarks on the floor in such a way that the robot orienteer can plot a route around them all.
WAYPOINTS: Decide on the location of your waypoints near each landmark. Mark these with a post-it note or a coin.
If necessary, adjust the positions of your landmarks and waypoints until you have a clear line of sight from each waypoint to the next, with sufficient space either side for your robot orienteer to drive through.
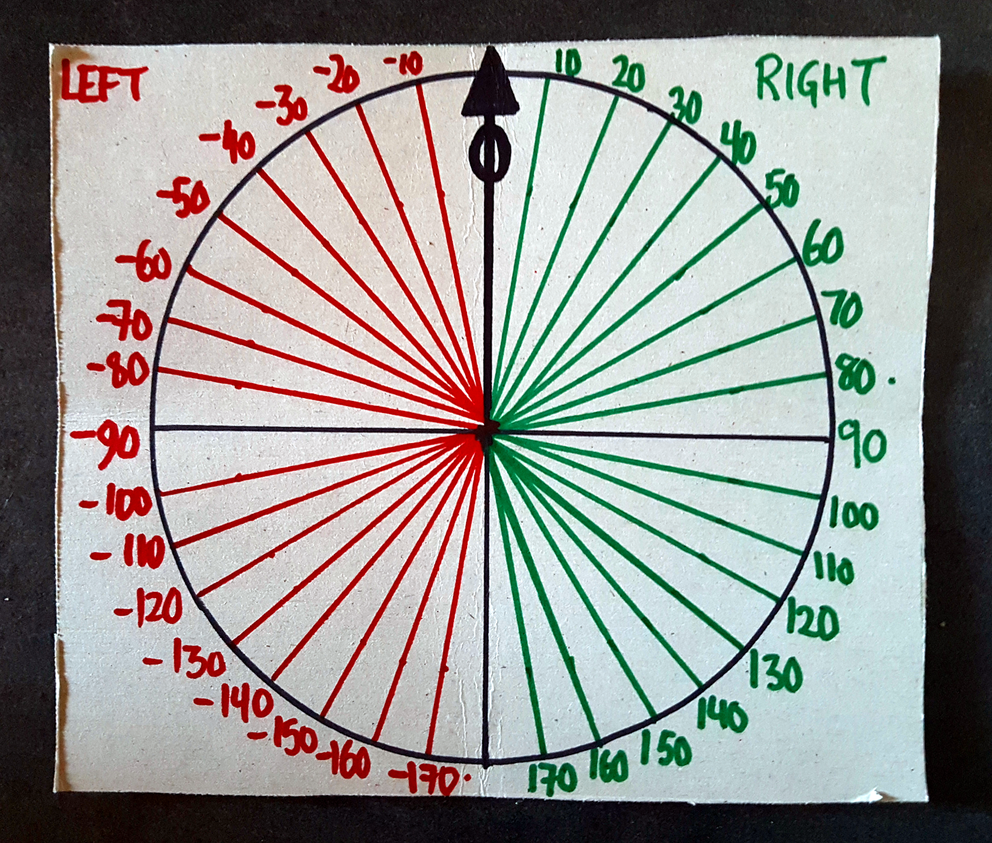
3. Make a Cardboard Compass
You will need to make a cardboard compass to calculate waypoint compass bearings:
- Cut a square of card from an empty cereal box
- Draw a circle on the card, either with a compass or tracing around a circular object
- Draw an arrow marking North (0 degrees)
- Using a protractor:
- Mark positive angles from 0 to +170 clockwise in 10 degree steps
- Mark negative angles from 0 to -170 anti-clockwise in 10 degree steps
4. Write a Set of Orienteering Directions
Write a set of directions that your robot orienteer can follow. Consider the following:
- where will it start
- where will it finish
- what direction will be your North*?
- how will it travel from one waypoint to the next
- what landmarks will it pass along the way
*for the sake of this exercise, your North does not have to correspond to the actual True North.
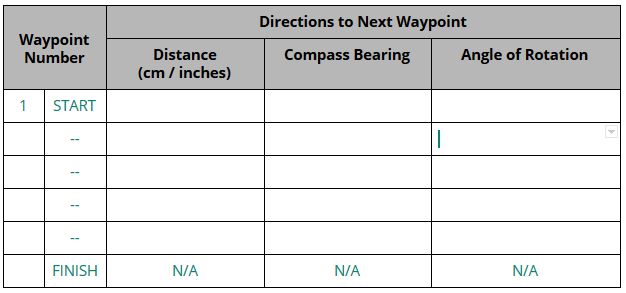
For each waypoint in your map fill in a row of the table below:
- measure straight line distance between your waypoints and enter this distance in the Distance column of the table below.
- choose a direction on your map to be your North. Using your cardboard compass, measure the compass bearings relative to your North of the following waypoint and enter it in the Compass Bearing column of the table below.
- calculate the angle of rotation necessary to point your robot orienteer at the next waypoint (clockwise > 0, anti-clockwise < 0) and enter it in the Angle of Rotation column of the table below.
Can you figure out how to calculate the angle of rotation? There are two ways this can be done. One of them requires some math, the other doesn’t. Do you know what they are?
5. Program Your Robot Orienteer
- Open a new notebook cell
- Write a program to navigate the robot orienteer from the starting waypoint to the final destination using straight lines with point turns at the waypoints.
Using the class library functions we introduced you to in the LEARN section, translate the human readable directions you have written above into instructions that your robot orienteer will understand.
SUGGESTION:
You can create a notebook cell for each of the steps your robot has to go through. For example, one cell takes the robot from waypoint 1 to waypoint 2, another from waypoint 2 to waypoint 3.
This allows you to run each step on its own without having to start at the beginning each time.
This is not a requirement.
6. Try It Out
Now you're ready to Try It Out!