Ops Manager Learn 2: Build and Calibrate
| Site: | GoLabs |
| Course: | Robotic Challenges with Python and GoPiGo |
| Book: | Ops Manager Learn 2: Build and Calibrate |
| Printed by: | Guest user |
| Date: | Sunday, 28 December 2025, 4:01 AM |
Description

This is the fourth challenge within the Robotics with GoPiGo and Python Curriculum.
Your task is to design a robot program that increases the volume of products that Amazing.com can ship out to its customers on a daily basis without increasing the number of robot pickers it employs.
Learn how to program and calibrate the Line Follower while they try to design an efficient system.
1. Assembly
Let’s attach the line follower sensor to our robot.
Check that you have the following parts:
- a black line follower sensor
- 2x long hexagonal posts (spacers)
- 4x bolts
- a small phillips screwdriver, like the one included with the GoPiGo3
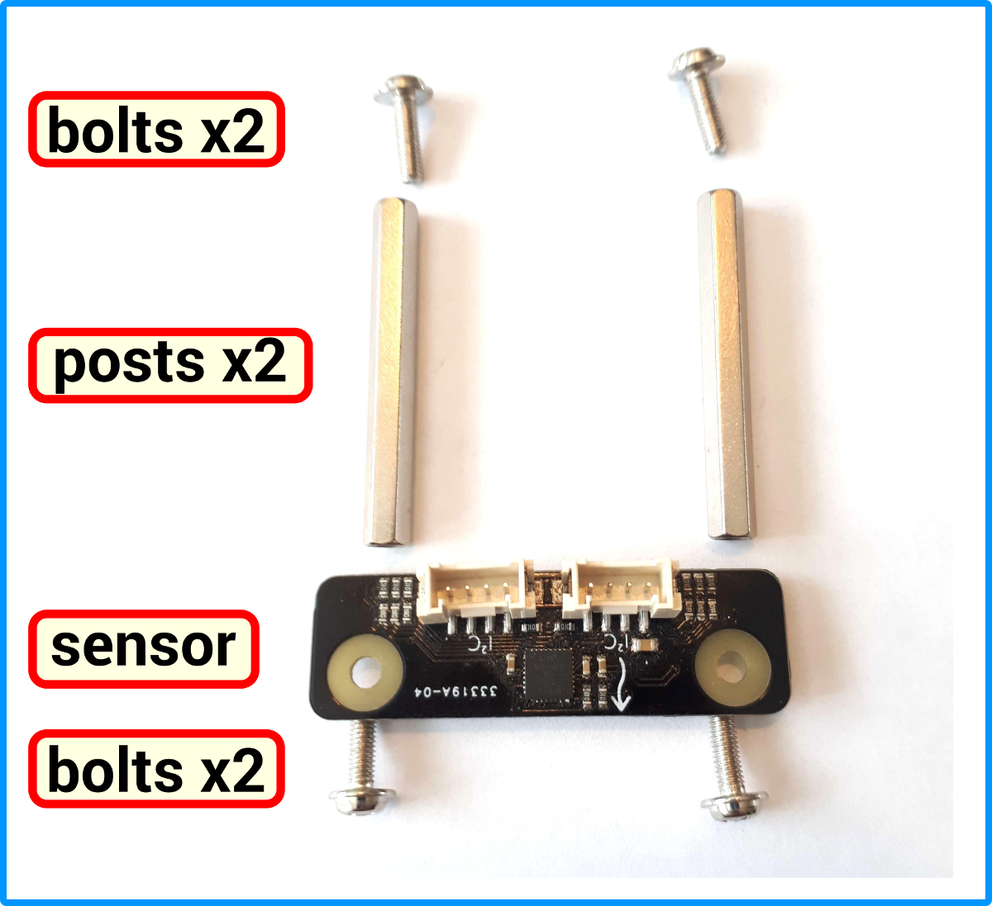
2. Assembly
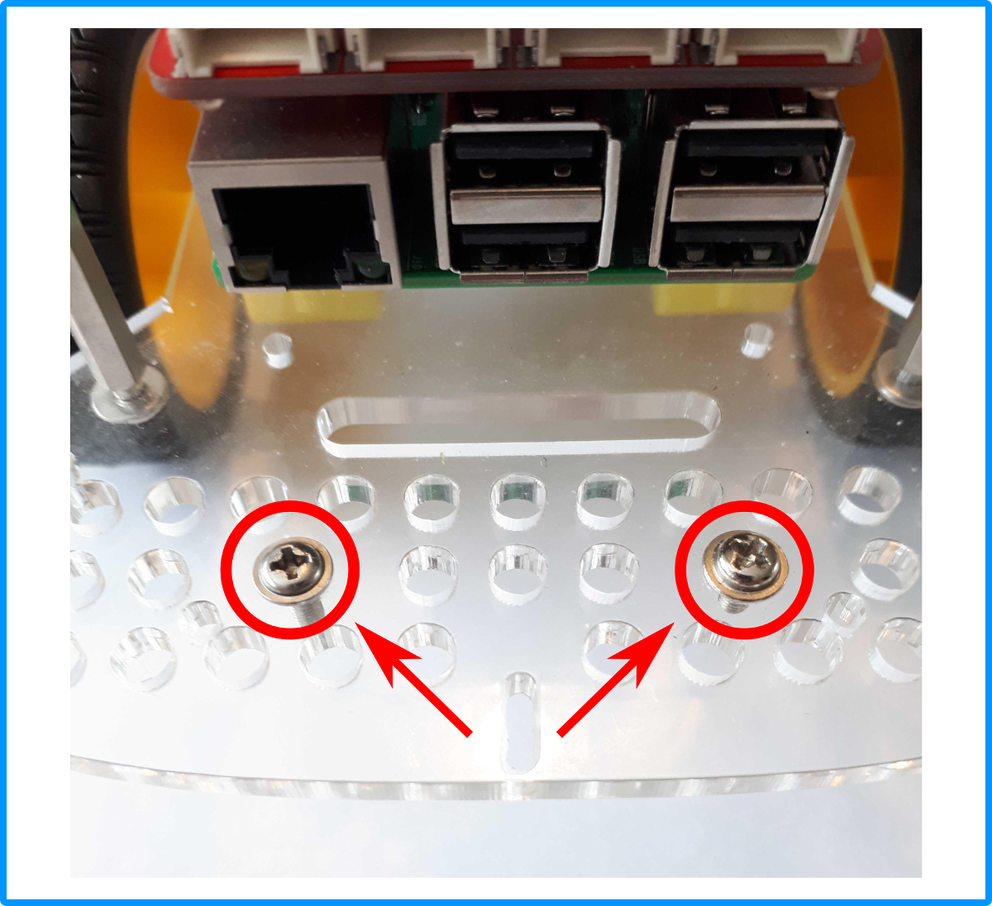
The bottom acrylic layer of the GoPiGo3 has two dedicated sensor attachment holes at the front.
- Insert two of the bolts in these holes as shown.
3. Assembly
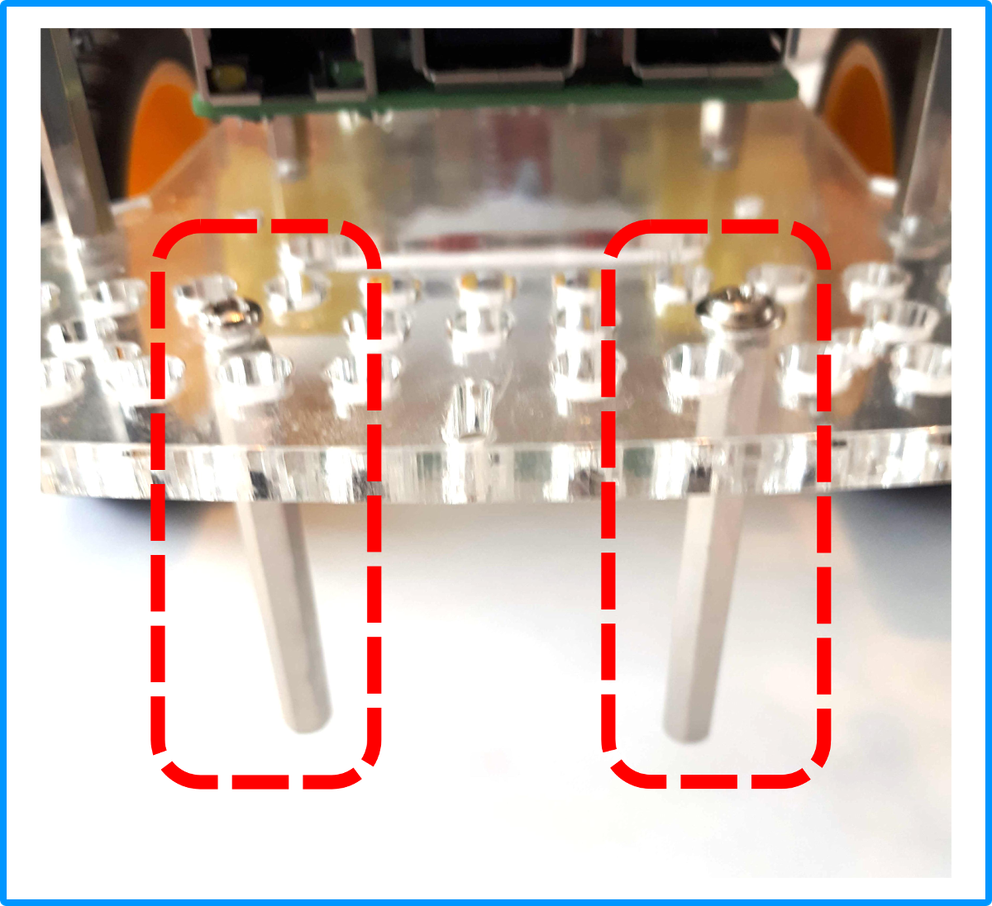
- Screw the two posts onto the bolts from beneath by hand.
- Holding the posts with your fingers, use the screwdriver to tighten them up, but not too tight.
4. Assembly
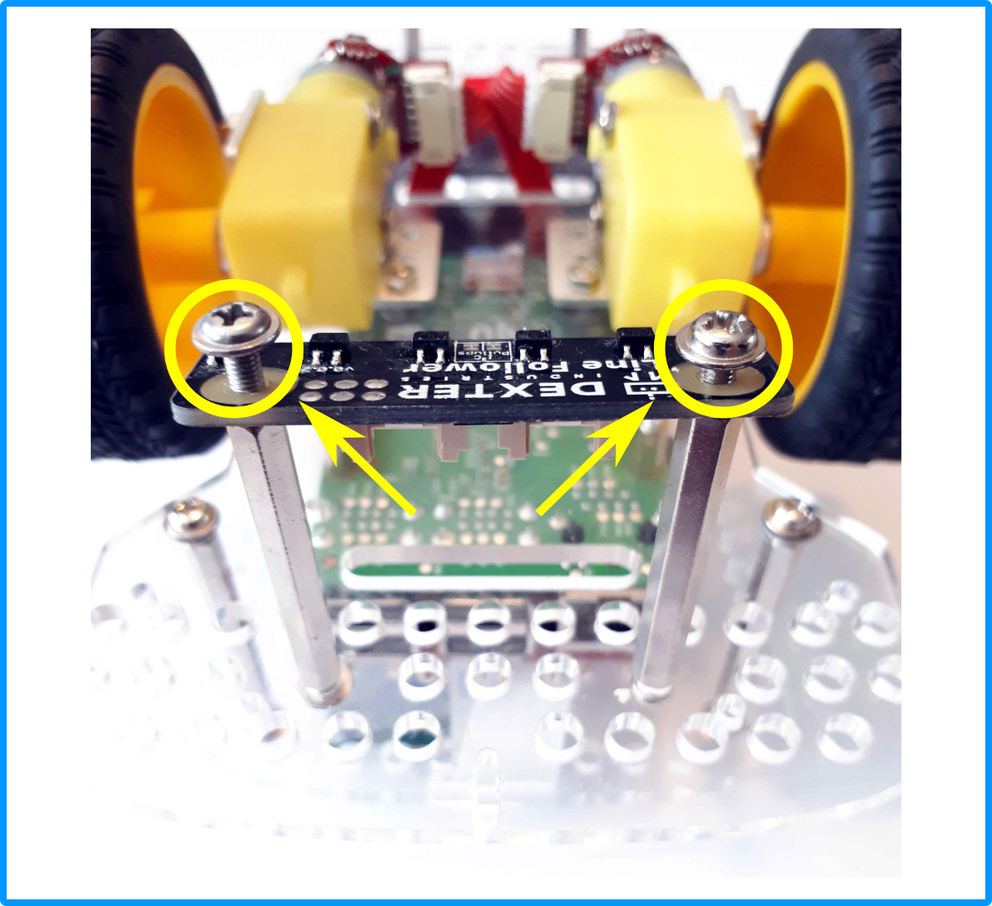
- Flip the GoPiGo3 onto its back.
- Position the line follower sensor so the sensors are at the back, near the motors and wheels, and the Dexter logo is facing the front.
- Use the remaining bolts to loosely attach the sensor to the posts.
5. Assembly
- Flip the GoPiGo3 back onto its wheels.
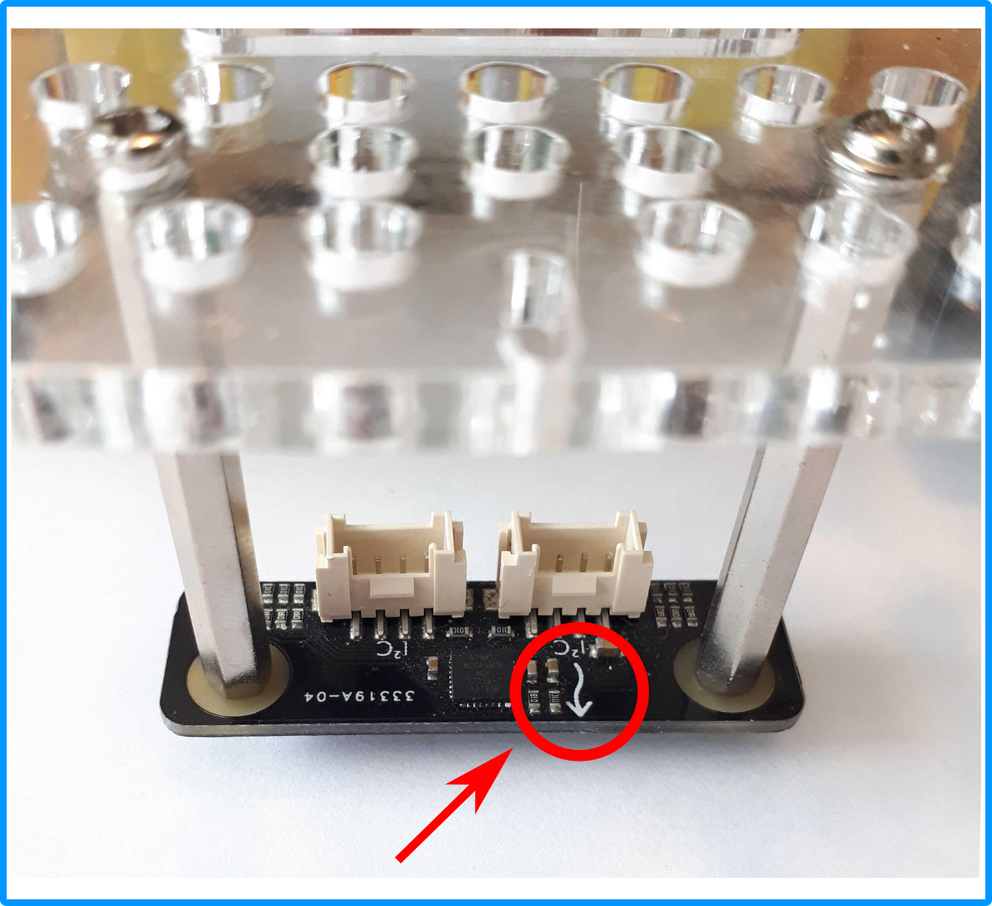
- Verify that the arrow is visible from above and pointing forwards.
- If it is, you can tighten the bolts using the screwdriver.
6. Assembly
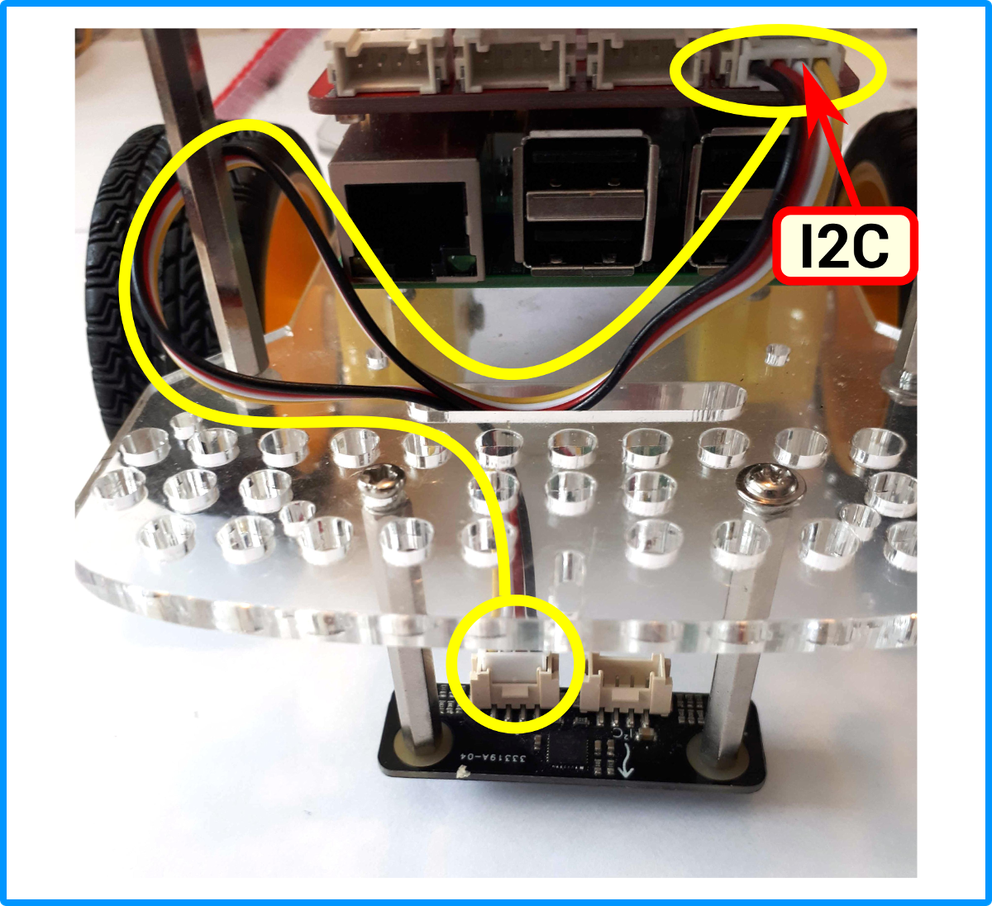
- Connect the sensor cable.
You can use either of the connectors on the line follower sensor and connect to either of the I2C connectors on the GoPiGo3.
7. Calibration and the Sensor Control Panel
A line follower sensor is a sensor that requires calibration.
Calibration is the process of configuring a sensor to take into account the environment in which the sensor readings are being taken. As ambient light influences the line follower sensor, it is best to calibrate it before starting to use it.
To accurately assess whether it is above a black or white area our line follower must be properly calibrated by providing it with typical examples of both colors in the current lighting conditions to take readings from. It stores these calibration readings on disk and in memory for later reference. When the line follower is subsequently presented with a color it will assess whether that color is black or white based on which of the stored calibration readings the current reading is closest to.
8. Calibrating the Line Follower Sensor
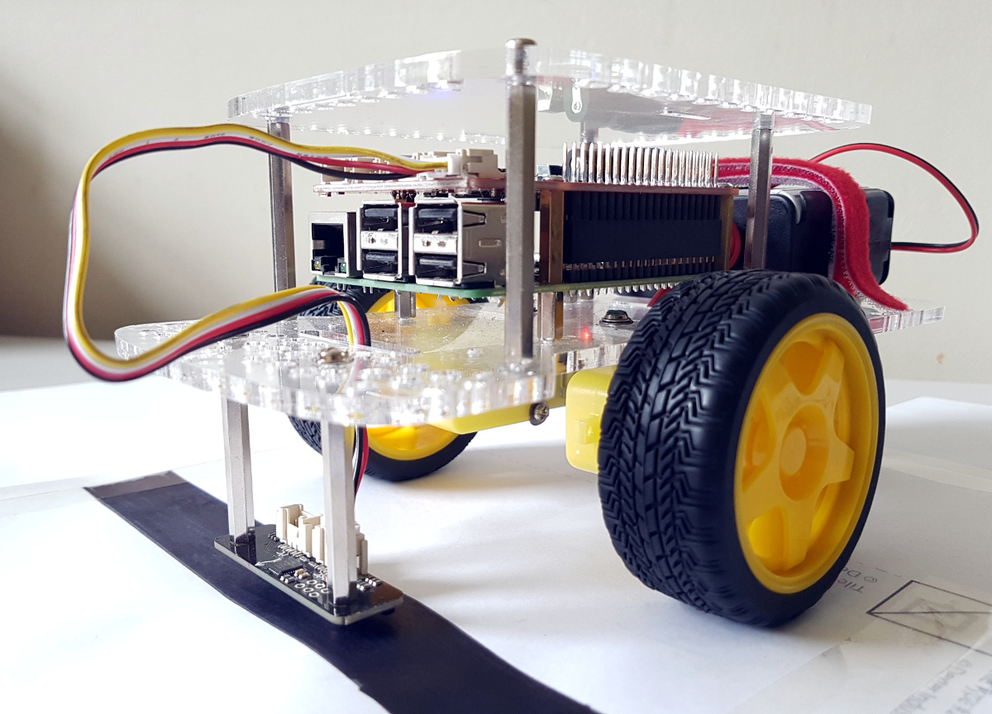
First, print off a straight line sheet from the free downloadable line follower template document.
9. Calibration: Select the Line Follower
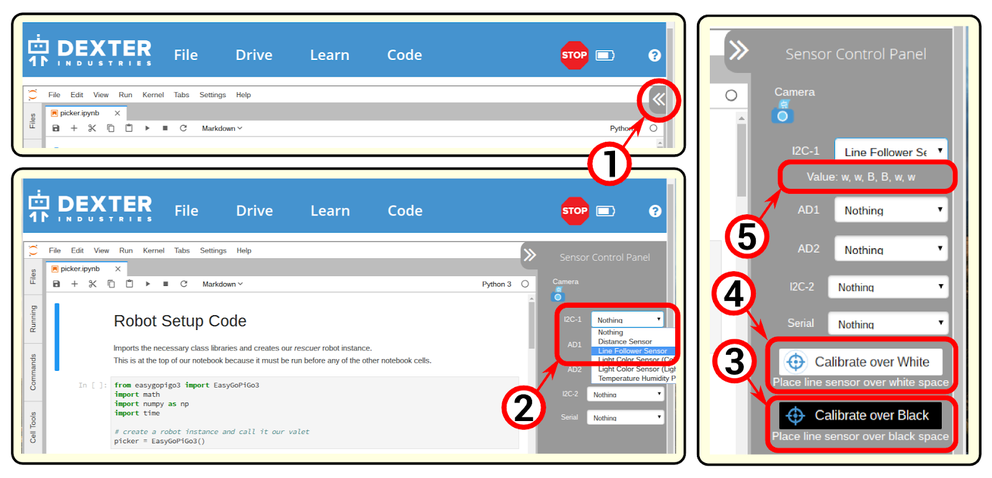
You can calibrate the line follower sensor by opening up the sensor control panel.
- Click on the little arrow top-right.
- Select the line follower in the control panel.
- You will find it either on the I2C-1 pulldown menu, or the IC2-2 pulldown menu. Either one will work.
- Once the sensor is selected, you will see a series of B and W, indicating what the sensor is perceiving. These readings may not be accurate right now because lighting conditions so we have to teach the sensor the notion of black and white.
- Place your GoPiGo over a black line, as seen in the photo above, and press the "Calibrate over Black" button.
- Place your GoPiGo over white paper, and press the "Calibrate over White" button.
- Move the robot over the line, and look at the series of B and W to get a feel of how a line follower works.
You can always use the Sensor Control Panel to get live readings from your sensors.
10. Thinking About Calibration
Calibration is an important notion when dealing with sensors.

What is the *key* aspect that may impact the accuracy of the calibration?
11. Next Step
You are now ready for the first build session : Ops Manager Learn 3: First Steps / Line Follower.