11 Mission Instructions
Your mission is to create a cookie delivery robot.
4. Build: Calibrate the Line Follower
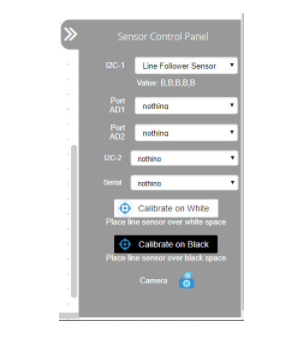
Finally, you need to calibrate the line follower. This sensor is sensitive to surrounding lighting conditions and needs to be calibrated each time there’s a major change in lighting. Use the drop down menu on the Sensor Control Panel for the I2C port that you plugged the line follower sensor into to choose the line follower. You will then see the calibration tools at the bottom of the Sensor Control Panel.
Place the sensor board over the black line so that all five individual sensors are over the line.
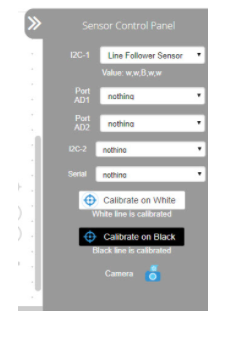
Click the Calibrate on Black button. When it is calibrated, it will say "Black line is calibrated" below the Calibrate on Black button.
Then, put the sensor board over white space, all five sensors should be over the white area. Click the Calibrate on White button. When it is calibrated, it will say "White line is calibrated" below the Calibrate on White button.
You can verify this by placing it centered over the black line, as if it was following it. When you look at the value for the Line Follower Sensor on the Sensor Control Panel it will read a value of five w's and/or B's. These values represent what each sensor is reading. A reading of w indicates that it is seeing white and a reading of B indicates it is seeing black. You should get either w,w,B,w,w or w,B,B,B,w depending on your line thickness.
The first picture below indicates that the GoPiGo’s line follower sensor is reading all black, and is not detecting any white at all. The second image below shows that the line follower sensor is reading centered over a black line.