Introduction
| Site: | GoLabs |
| Course: | Robotic Challenges with Python and GoPiGo |
| Book: | Introduction |
| Printed by: | Guest user |
| Date: | Wednesday, 24 June 2026, 5:32 AM |
Description
 This is the first challenge within the Robotics with GoPiGo and Python Curriculum.
Your task is to program your robot to navigate an area of previously unseen terrain to reach its destination, passing through a number of waypoints.
1. Task
You have been tasked with helping your robot navigate an area of previously unseen terrain to reach its destination, passing through a number of waypoints.
You must create a physical map with a starting point, a number of landmarks and waypoints, and a destination.
You will then provide your robot with a set of directions to follow which will take it from the starting point to the destination, passing all the landmarks and using the waypoints as navigational aids.
2. Vocabulary
A landmark is a recognisable feature of a landscape or town. Landmarks often used to establish your location.

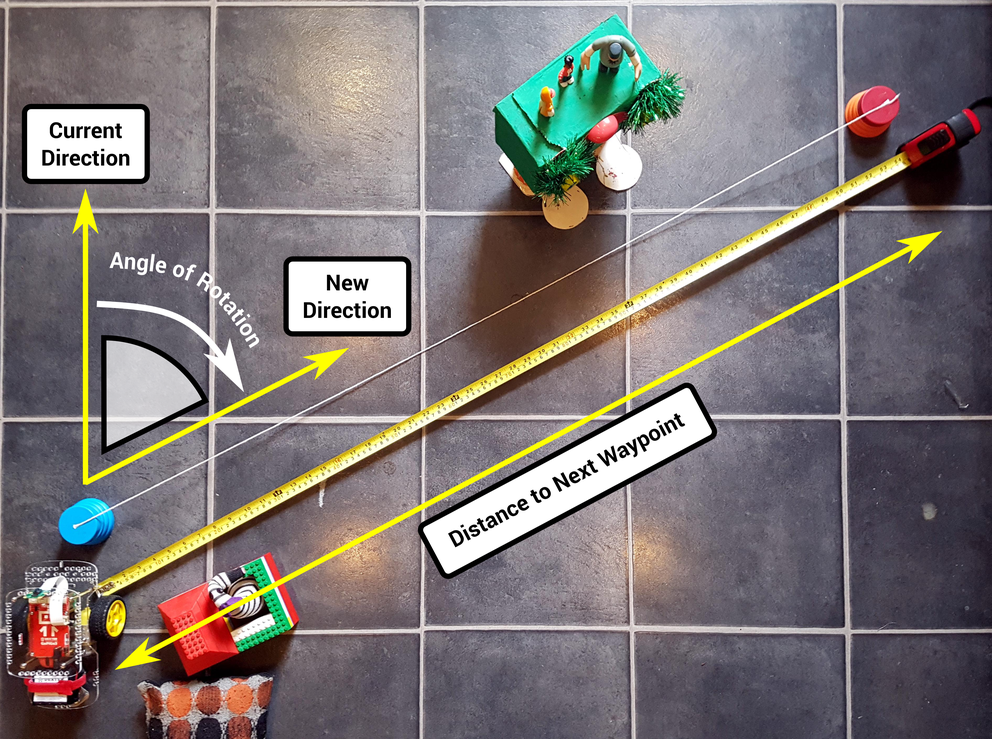
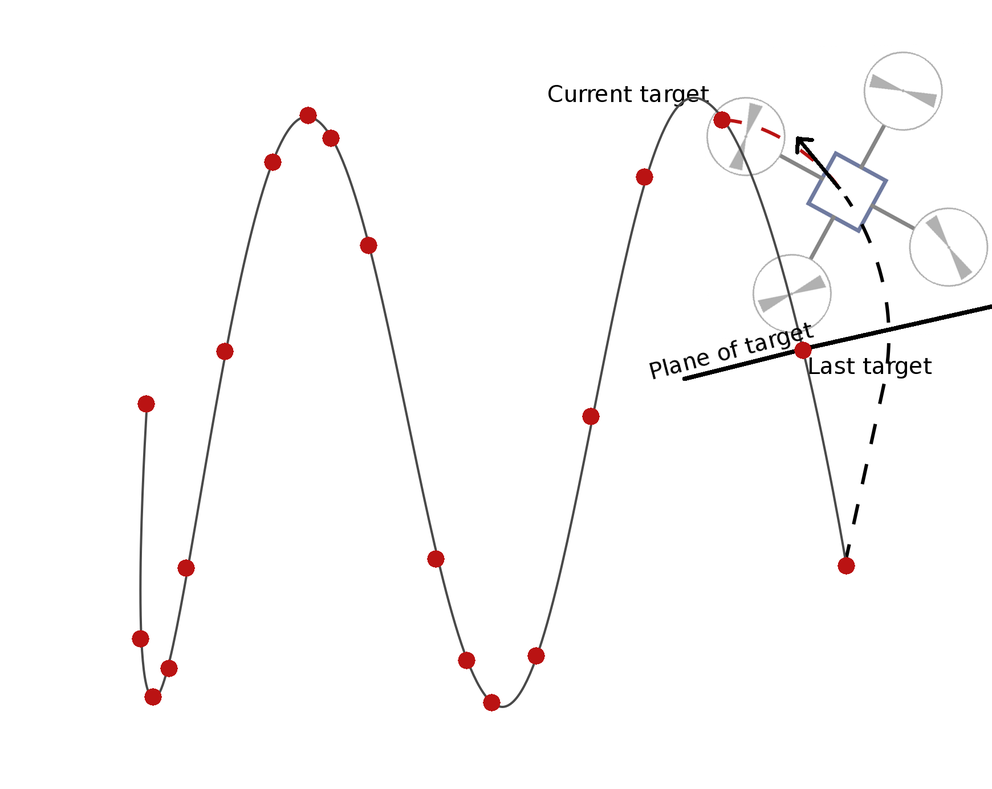
A waypoint is a physical location in space where we want to change direction or stop. Waypoints are often used as navigational aids for ships and planes.
Class: a blueprint for creating objects of a specific type (e.g. cars) and describing their properties (e.g. make, model, color) and the things that they can do (e.g. drive forward)
Instance: an object that has been constructed from a class. The car that is stopped at the light is an example of an instance of the class 'car'. So is the other car which is currently speeding and might not stop in time to avoid an accident.
Function: a collection of lines of code that map to a specific functionality and is referred to by a name.
Argument: a value that may be passed to a function.
3. Considerations
- Where does your GoPiGo need to go?
- What kind of landmarks will your map have that the GoPiGo can use as navigational aids?
- Where will your waypoints be located?
- How far and in what direction does the GoPiGo need to move to get from one waypoint to the next?
4. Materials
- GoPiGo3
- A wifi-enabled laptop or computer
- For the map / landmarks: everyday objects. e.g. toys, furniture, books
- For marking waypoints: post-it notes or coins
- For measuring distances: a tape measure or blu-tac, string, scissors and a ruler
- For the cardboard compass: scissors, a cereal box, compass, pencil and protractor
5. Assembly
Before you start this mission, your GoPiGo should already be assembled.
If it is not, please refer to The Getting Started Guide for assembly instructions.
6. Learn
These three short lessons will teach you what you need to know in order to succeed in the main project. You will need all of these lessons to be successful during the project.
Learn 2: Classes and Instances
Learn 3: 3... 2... 1... GO-PI-G-G-G-G-GO!!!
7. Main Project
This is the main project of this mission. You will spend the majority of your time here, applying everything you learned in the Learn section. If you are running short on time, focus on the Learn section above and skip the Project.
This lesson will guide you through it: Orienteering Project
This lesson will guide you through testing your solution: Try It Out
8. Extension
If you want to go a bit further, take a look at our project extensions for additional challenges.